Vueで親コンポーネントへdataの値を渡す方法
Vueで親コンポーネントへdataの値を渡す方法について備忘録としてこちらにまとめます。
Vueのインスタンスをグローバル登録した際にdataプロパティの値を親コンポーネントに渡す方法は、以下の2つになります。
1つ目
  <div id="app">
    <my-component v-bind:list="list"></my-component>
  </div>
Vue.component('my-component', {
  template: `
    <ul>
      <comp-child v-for="item in list" v-bind:key="item.id" v-bind:name="item.name" v-bind:hp="item.hp"></comp-child>
    </ul>`,
    props: ['list']
})

Vue.component('comp-child', {
  template: '<li>{{ name }} HP.{{ hp }}</li>',
  props: ['name', 'hp']
});

new Vue({
  el: '#app',
  data: {
    list: [
      { id: 1, name: 'スライム', hp: 100 },
      { id: 2, name: 'ゴブリン', hp: 200 },
      { id: 3, name: 'ドラゴン', hp: 500 }
    ]
  }
});
Vueインスタンスにdataプロパティが設定されているので、htmlのid="app"の中では、dataの値を使えるので、v-bindで属性を設定し、属性の値としてdataの値を渡す。
親コンポーネント(my-component)でpropsとして属性に設定した値を受け取る。
2つ目
  <div id="app">
  </div>
Vue.component('my-component', {
  template: `
    <ul>
      <comp-child v-for="item in list" v-bind:key="item.id" v-bind:name="item.name" v-bind:hp="item.hp"></comp-child>
    </ul>`,
    props: ['list']
})

Vue.component('comp-child', {
  template: '<li>{{ name }} HP.{{ hp }}</li>',
  props: ['name', 'hp']
});

new Vue({
  el: '#app',
  data: {
    list: [
      { id: 1, name: 'スライム', hp: 100 },
      { id: 2, name: 'ゴブリン', hp: 200 },
      { id: 3, name: 'ドラゴン', hp: 500 }
    ]
  },
  template: '<my-component :list="list"></my-component>'
});
template オプションを使って、my-component をルートコンポーネントとして指定する。
※
ルートコンポーネントとは、Vue.jsアプリケーション全体のエントリーポイントとなる最初のコンポーネントのことを指します。
このルートコンポーネントが、他のすべての子コンポーネントの親となる。
一般的には、Vueインスタンスに直接マウントされるコンポーネントのことを指す。
id="app"の部分にルートコンポーネントがマウントされる。
Vue.jsのカスタムディレクティブのフックの違い
Vue.jsのカスタムディレクティブのフックの違いについて備忘録として、こちらにまとめます。
Vue.jsのカスタムディレクティブのフックには、以下の6つがある。
- bind
- inserted
- update
- componentUpdated
- unbind
それぞれのフックのタイミングは、以下のようになる。
bind: ディレクティブが初めて要素にバインドされたときに呼び出される。(ディレクティブが要素と紐づいた時)
inserted: ディレクティブが設定されている要素が親ノードに挿入されたときに呼び出さる。(この時点で要素は確実にDOMに存在します。)
実際の挙動
  <div id="app">
    <input v-example>
  </div>
new Vue({
  el: '#app',
  directives: {
    example: {
      // ディレクティブが初めてバインドされたときに呼び出される
      bind: function(el) {
        console.log('v-example bind');
        el.value = 'バインドされました';
      },
      // バインドされた要素が親ノードに挿入されたときに呼び出される
      inserted: function(el) {
        console.log('v-example inserted');
        el.focus();
      }
    }
  }
});
ポイント
bindフックとinsertedフックの違いは、ディレクティブが要素に紐づいた時か、ディレクティブが設定されている要素が親ノードに挿入された時かの違い。
処理の順番として以下のようになる。
①要素とディレクティブが紐づく(このタイミングでは、Nodeツリーは、構築されていない。)
②Nodeツリーが構築される
update: ディレクティブが紐づいている要素が再レンダリングされるたびに呼び出される。子コンポーネントの更新は含まれない。
componentUpdated: ディレクティブが紐づいている要素が含まれるコンポーネントとその子コンポーネントが全て再レンダリングされた後に呼び出される。
実際の挙動
  <div id="app">
    <input v-example v-model="inputValue">
    <p>{{ inputValue }}</p>
  </div>
new Vue({
  el: '#app',
  data: {
    inputValue: 'テストです!'
  },
  directives: {
    example: {
      update: function(el) {
        console.log('v-example update');
      },
      componentUpdated: function(el) {
        console.log('v-example componentUpdated');
      }
    }
  }
});
unbind: ディレクティブが紐づいている要素から取り除かれた時に 1 度だけ呼ばれる。
実際の挙動
  <div id="app">
    <button v-on:click="addInput">入力フィールドを追加</button>
    <button v-on:click="removeInput">入力フィールドを削除</button>
    <div v-for="(input, index) in inputs" :key="index">
      <input v-example>
    </div>
  </div>
Vue.jsのwatchでのnewValとoldVal
Vue.jsのwatchでのnewValとoldValの参照について、備忘録としてまとめます。
watchの中で、変更後の値と古い値を参照できるが、参照する際に気をつけないと、古い値と新しい値が同期してしまう。
具体的なイメージを掴むために、以下に具体的なコードを示します。
[古い値と新しい値が同期してしまう。]
  <div id="app">
    <button v-on:click="change">チェンジ</button>
    <ul>
      <li v-for="item in list" :key="item">{{ item }}</li>
    </ul>
  </div>
new Vue({
  el: '#app',
  data: {
    list: [1, 2, 3]
  },
  methods: {
    change: function() {
      // 配列に新しい要素を追加
      this.list.push(this.list.length + 1);
    }
  },
  created: function() {
    this.$watch(
      'list',
      function(newVal, oldVal) {
        console.log('New length:', newVal.length);
        console.log('Old length:', oldVal.length);
      },
      {
        immediate: true
      }
    );
  }
});
ブラウザでは、最初に以下のように表示される。
 gyazo.com
[チェンジ]ボタンをクリックすると以下のように表示される。
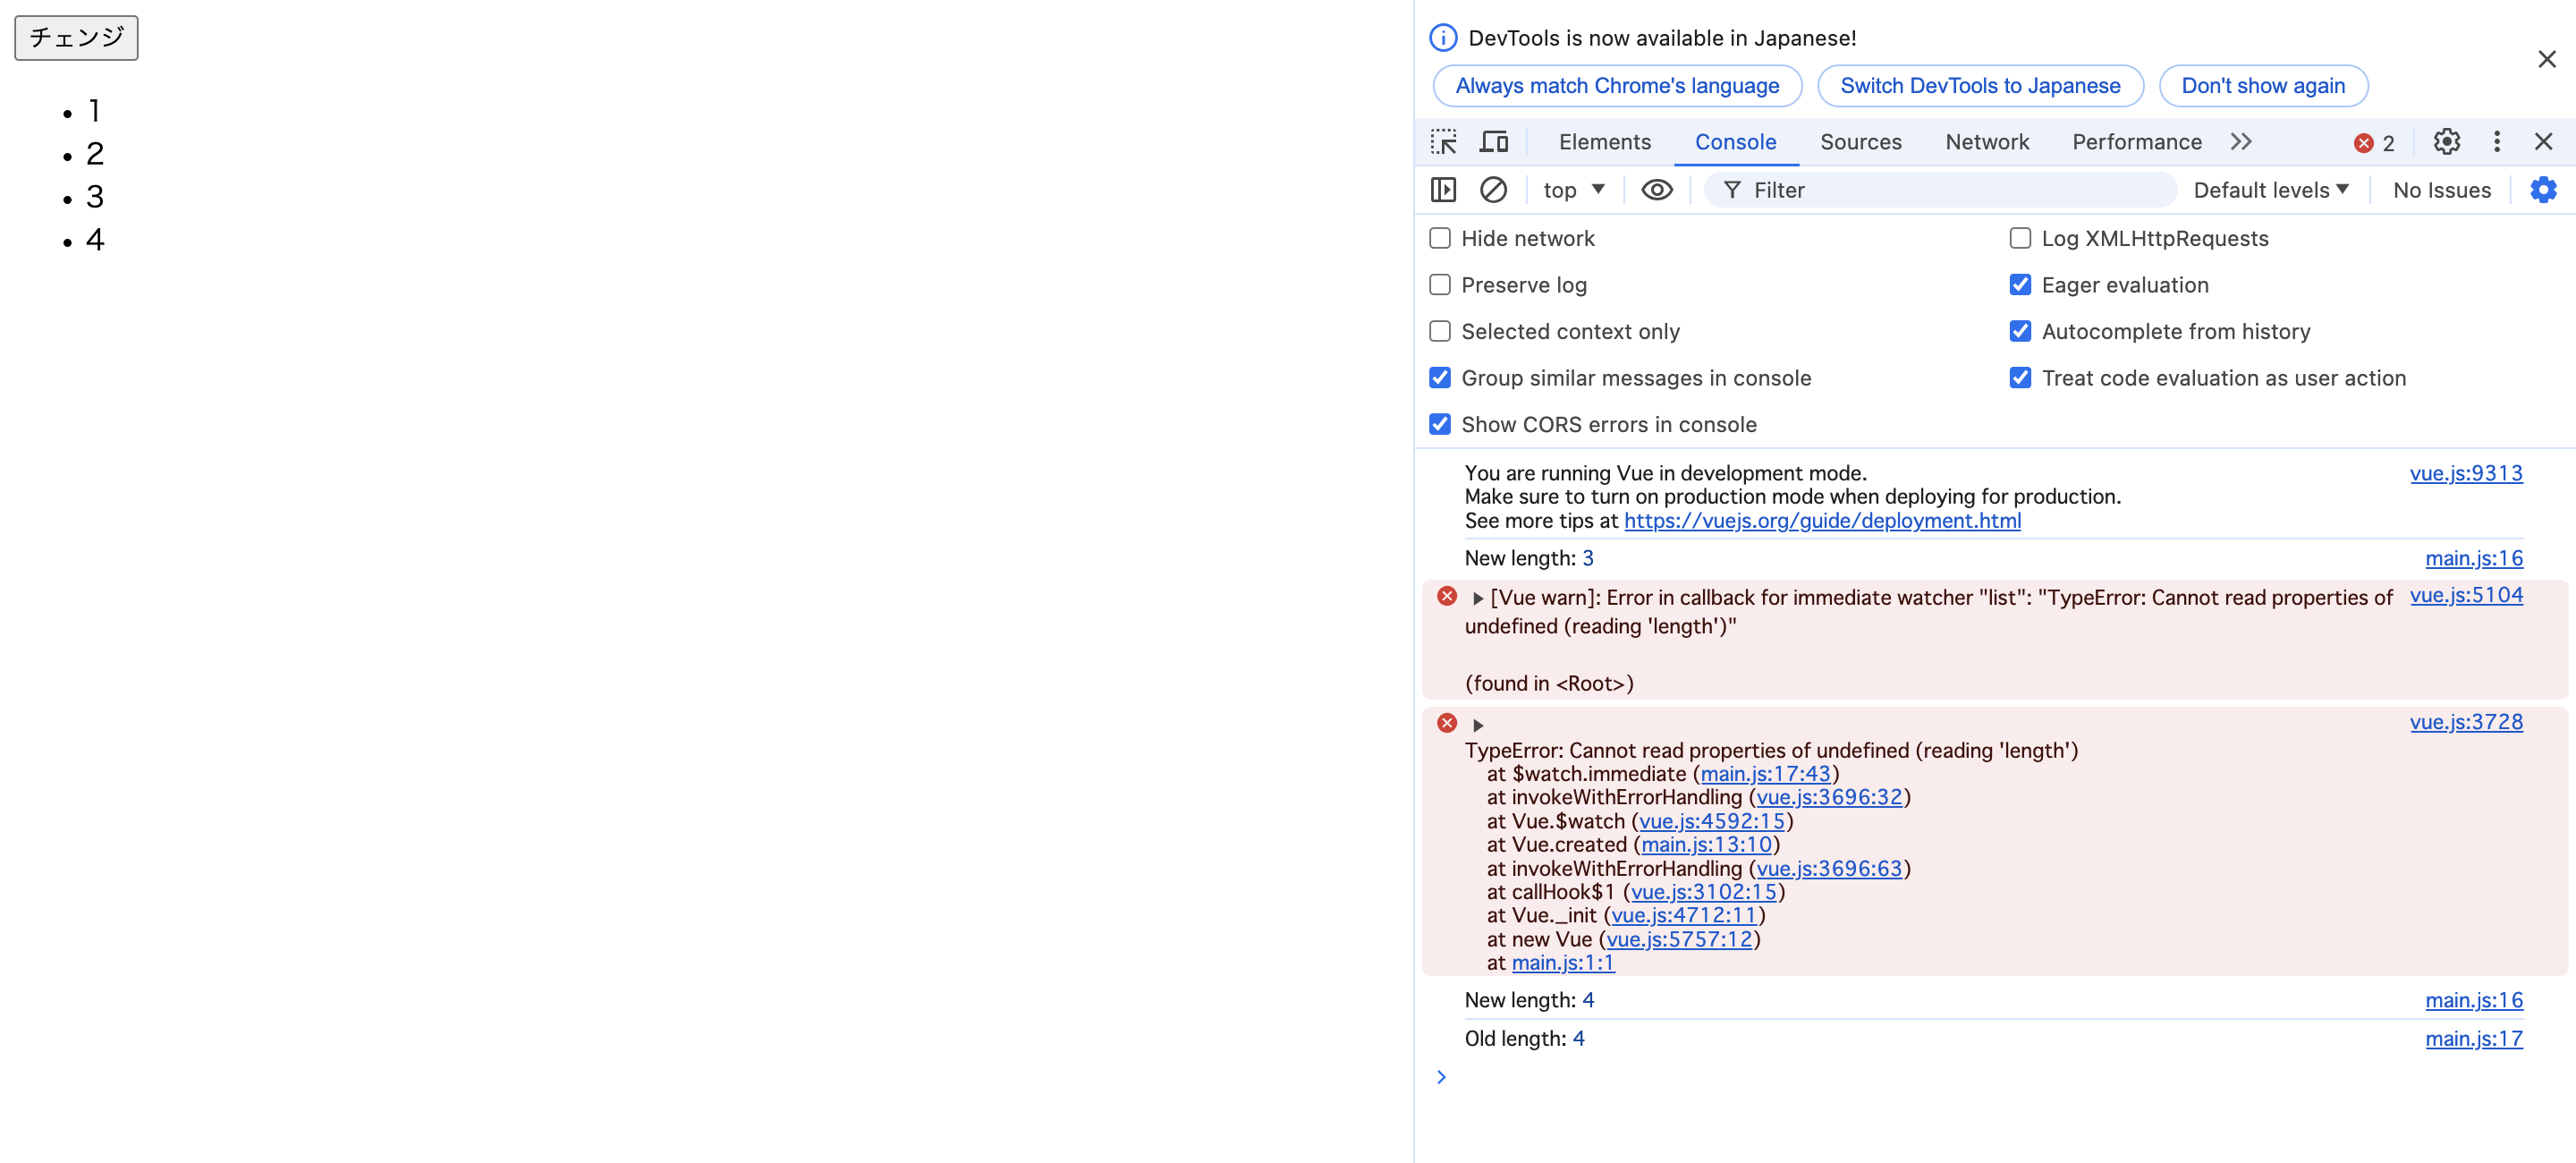 gyazo.com
※
[チェンジ]ボタンをクリックすると、watchで監視しているデータが変更されても、newValとoldValが同期してしまい同じ要素数が表示されてしまう。
以下に対処法の具体例を示します。
[古い値と新しい値が同期しないように、監視対象の配列をコピーする。]
  <div id="app">
    <button v-on:click="change">チェンジ</button>
    <ul>
      <li v-for="item in list" :key="item">{{ item }}</li>
    </ul>
  </div>
new Vue({
  el: '#app',
  data: {
    list: [1, 2, 3]
  },
  methods: {
    change: function() {
      // 配列に新しい要素を追加
      this.list.push(this.list.length + 1);
    }
  },
  created: function() {
    this.$watch(
      function() {
        return Object.assign([], this.list); // 配列のシャローコピーを返す
      },
      function(newVal, oldVal) {
        console.log('New length:', newVal.length);
        console.log('Old length:', oldVal.length);
      },
      {
        immediate: true
      }
    );
  }
});
Object.assign([], this.list)は、this.list配列をシャローコピー(浅いコピー)する。
createdにwatchの処理を入れることで、最初に監視対象に設定できる。
ブラウザでは、最初に以下のように表示される。
 gyazo.com
[チェンジ]ボタンをクリックすると以下のように表示される。
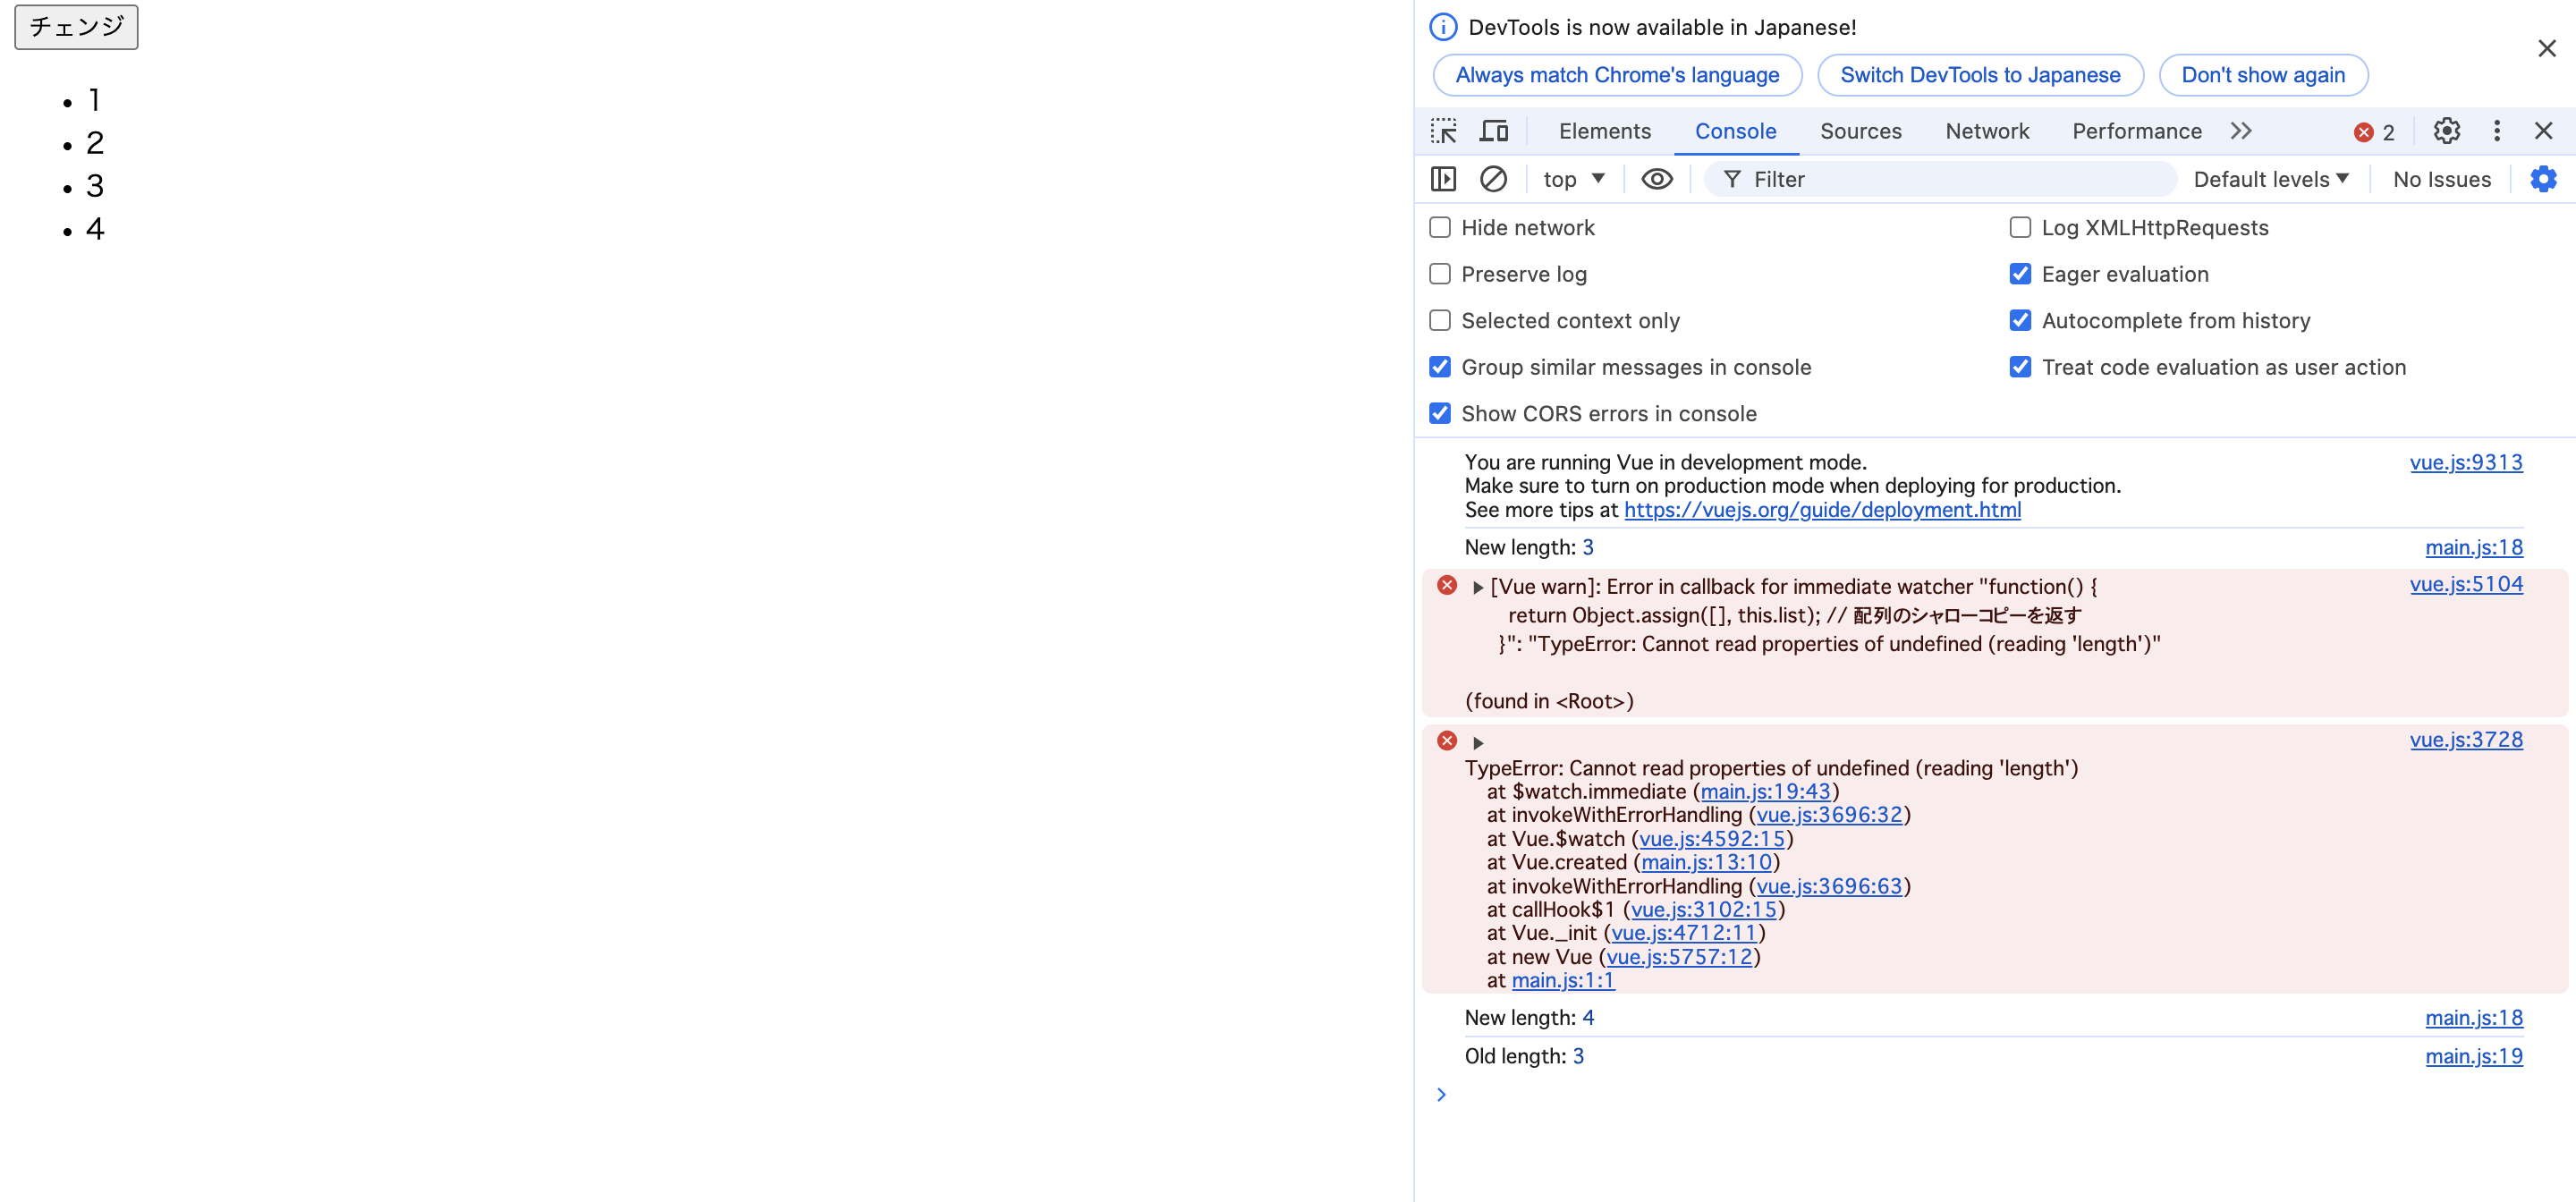 gyazo.com
※
[チェンジ]ボタンをクリックすると、watchで監視しているデータが変更され、newValとoldValの要素数を取得できる。
[古い値と新しい値が同期しないように、対象のデータにプロパティを追加する。]
  <div id="app">
    <button v-on:click="change">チェンジ</button>
    <ul>
      <li v-for="item in list" :key="item">{{ item }}</li>
    </ul>
  </div>
new Vue({
  el: '#app',
  data: {
    list: [1, 2, 3]
  },
  methods: {
    change: function() {
      // 配列に新しい要素を追加
      this.list.push(this.list.length + 1);
    }
  },
  created: function() {
    this.$watch(
      function() {
        return { value: this.list, length: this.list.length } // 配列のシャローコピーを返す
      },
      function(newVal, oldVal) {
        console.log('New length:', newVal.length);
        console.log('Old length:', oldVal.length);
      },
      {
        immediate: true
      }
    );
  }
});
対象のデータにプロパティを追加する。
createdにwatchの処理を入れることで、最初に監視対象に設定できる。
ブラウザでは、最初に以下のように表示される。
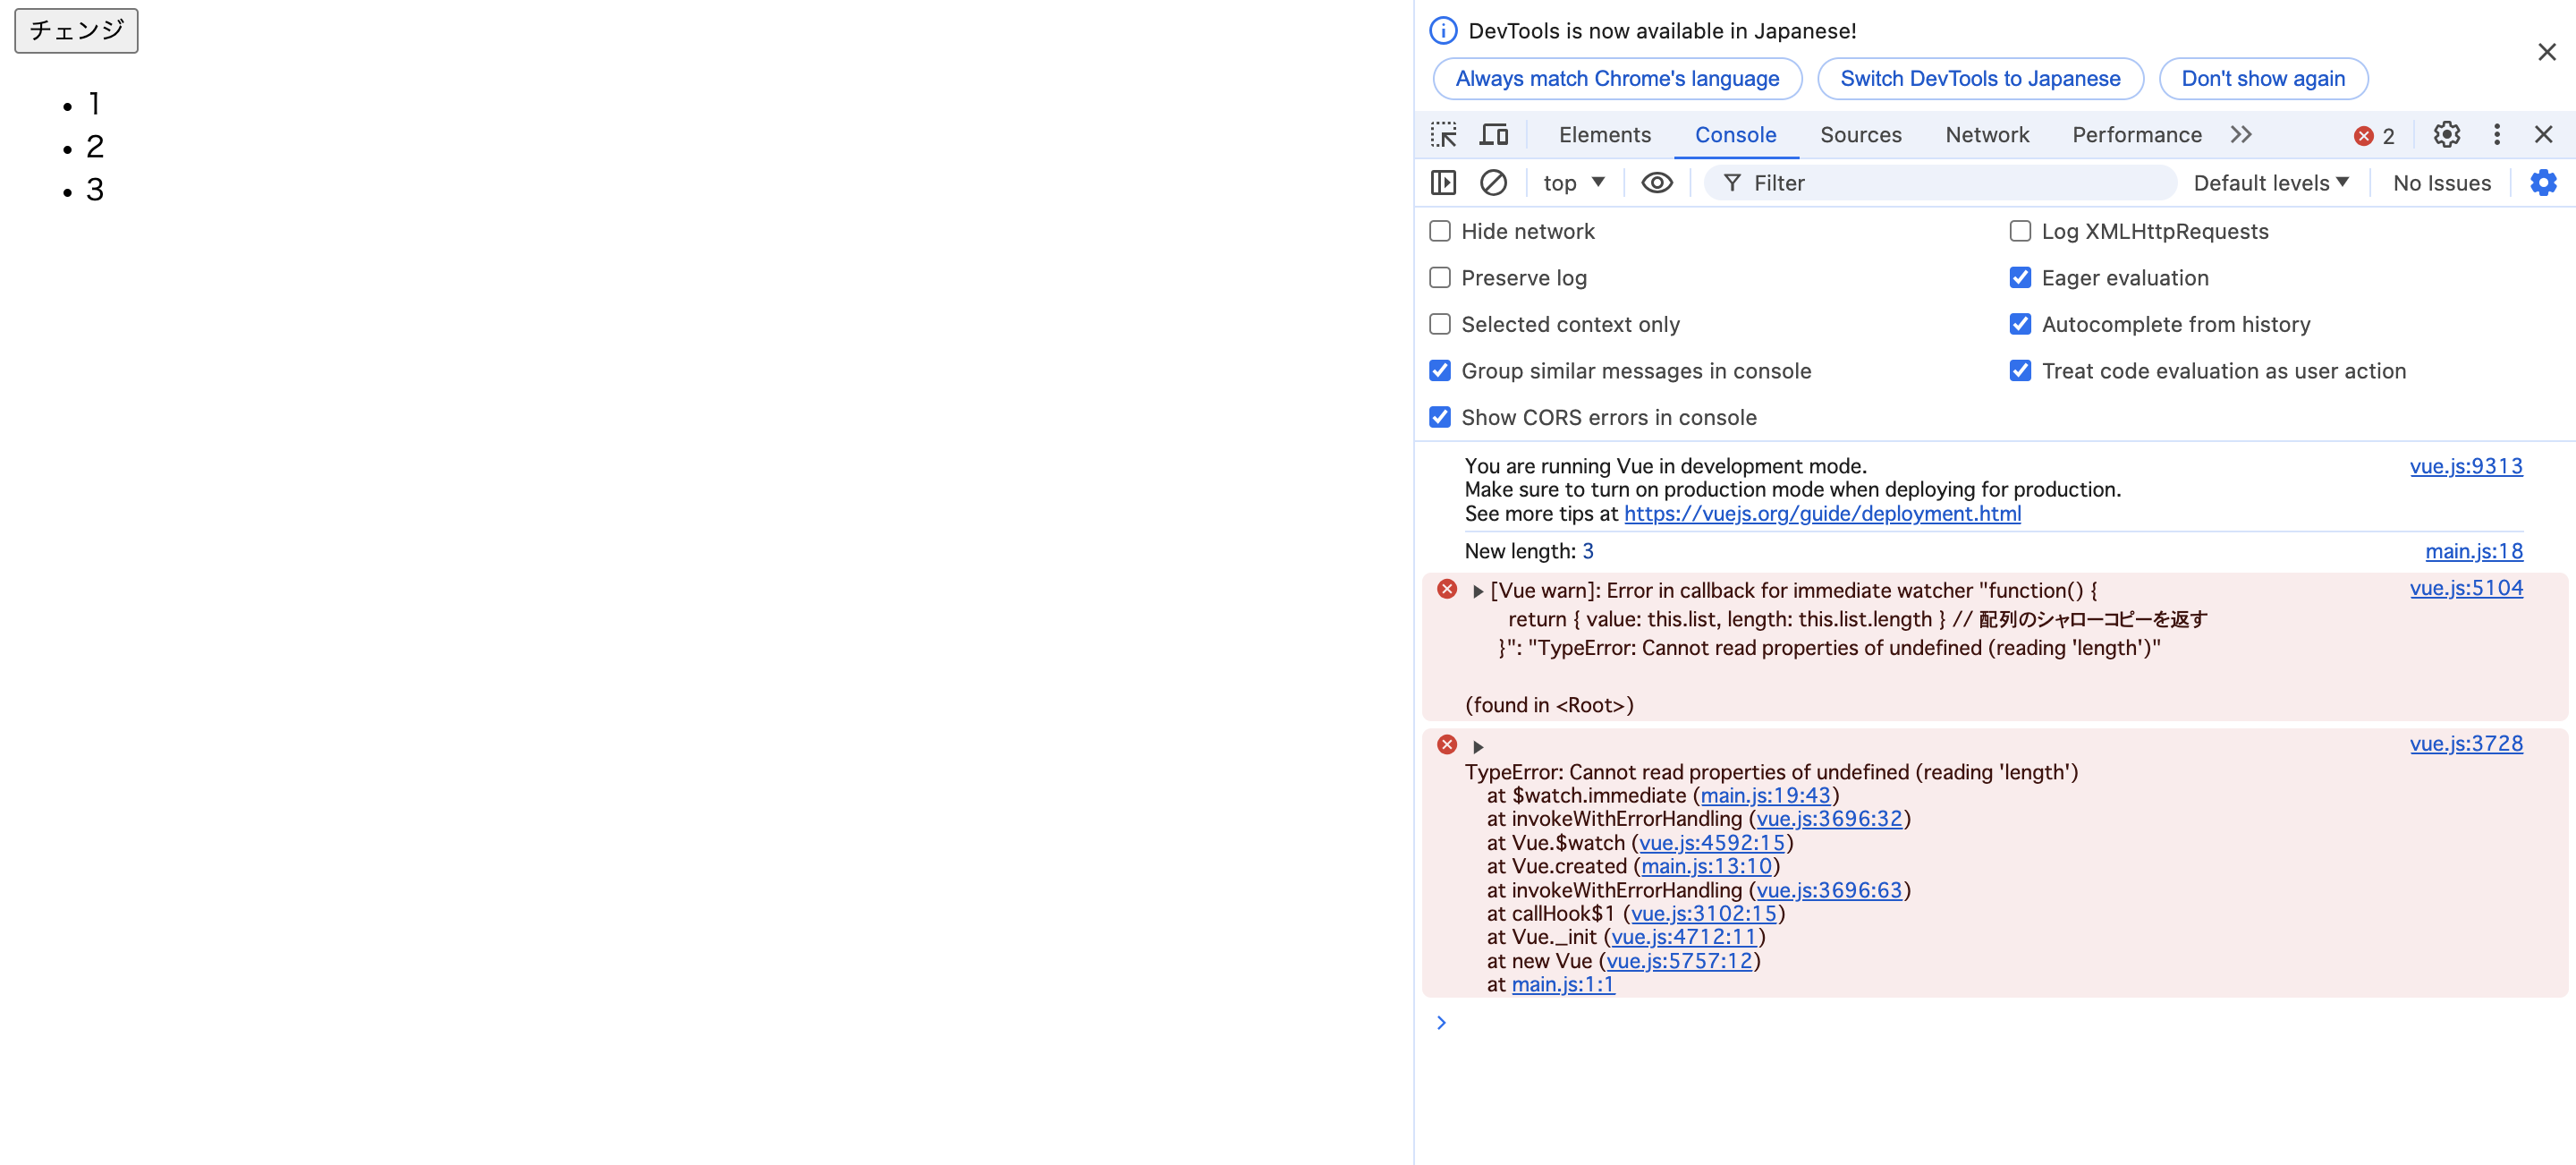 gyazo.com
[チェンジ]ボタンをクリックすると以下のように表示される。
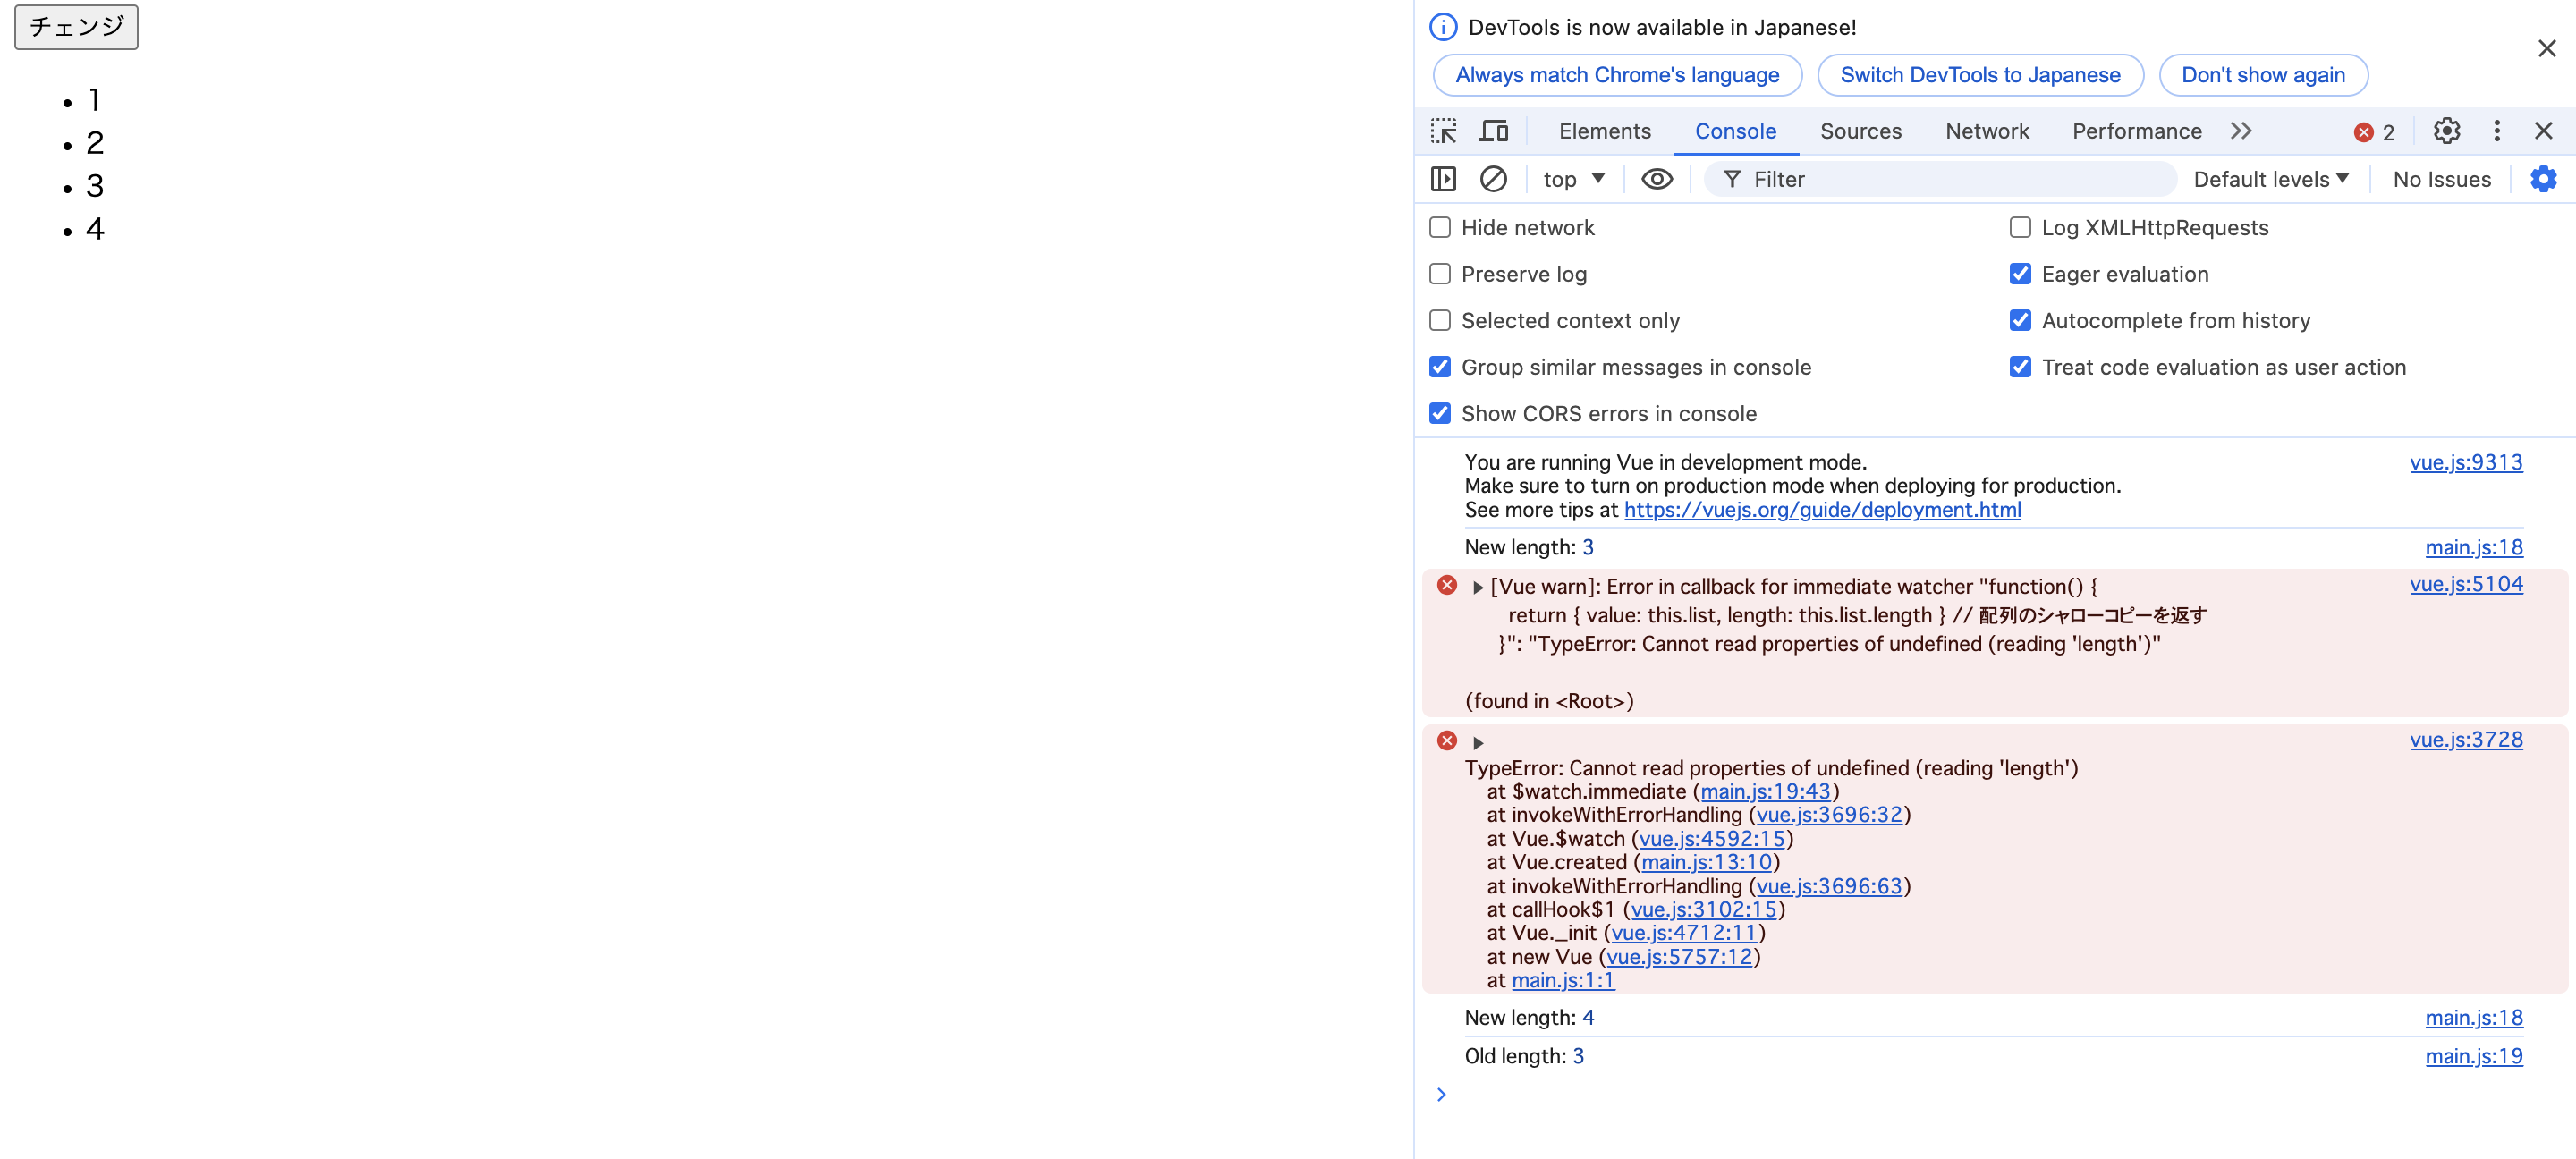
※
[チェンジ]ボタンをクリックすると、watchで監視しているデータが変更され、newValとoldValの要素数を取得できる。
Vue.jsのimmediateオプションとdeepオプションの挙動
Vue.jsのimmediateオプションの挙動について、備忘録としてまとめます。
immediateオプションをtrueにすると、初期化時に呼び出される。
以下に挙動を具体的にイメージするためのコードを記載します。
 <div id="app">
    <button v-on:click="change">チェンジ</button>
    <p>{{ watchTarget }}</p>
  </div>
[wachを定義(immediateオプションがfalse)した後で、データを変える]
new Vue({
  el: '#app',
  data: {
    width: 400,
    height: 600
  },
  methods: {
    change: function() {
      this.$watch(function() {
        [this.width, this.height]
      }, function() {
        console.log('テストです!');
      }, { deep: true, immediate: false });

      this.width = 400
      this.height = 400
    }
  },
  computed: {
    watchTarget: function() {
      return [this.width, this.height]
    }
  }
})
ブラウザでの初期表示は、以下のようになる。
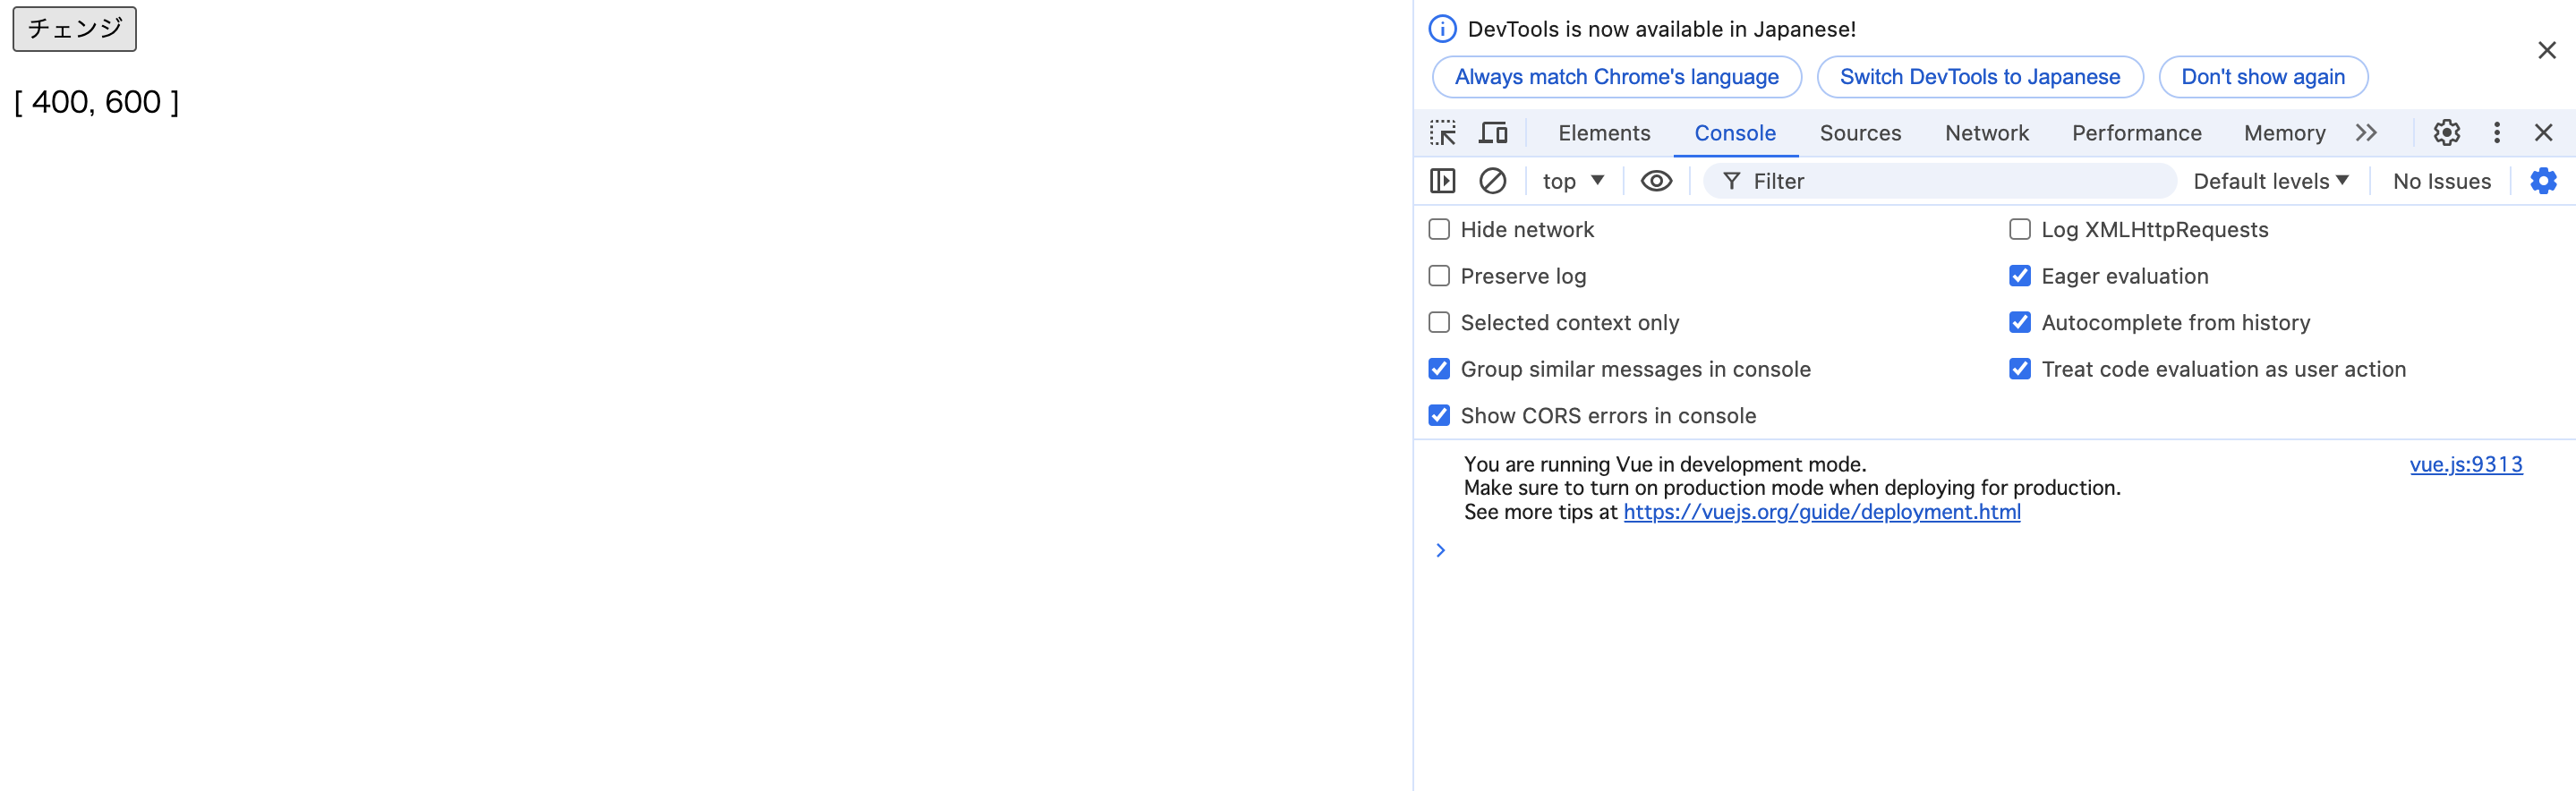 gyazo.com
[チェンジ]ボタンをクリックした後のブラウザの表示は、以下のようになる。
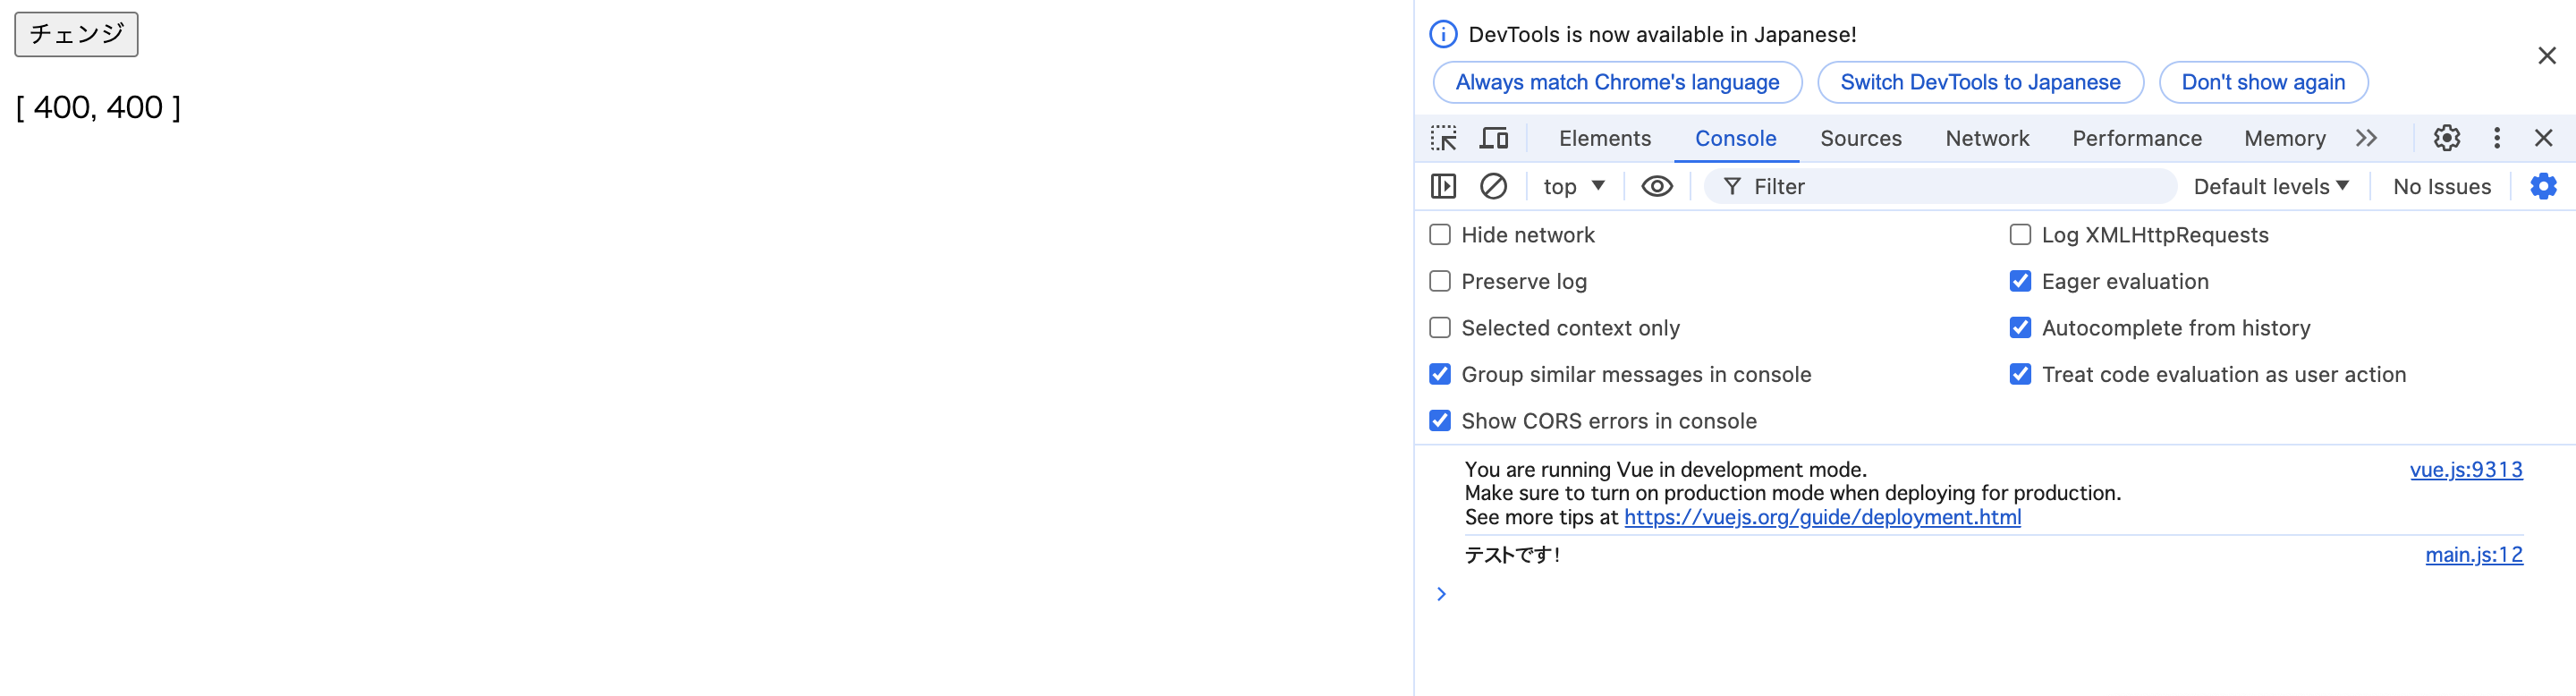 gyazo.com
※
処理の流れは、以下のようになっている。
①[チェンジ]ボタンをクリックした時にchangeメソッドの中に処理が入る。
↓
②immediateオプションがfalseになってるので、console.log('テストです!');は、実行されない。(初回の1回目の時には、実行されない。)
↓
③watchで監視しているデータが変更されたので、changeメソッドが発火されconsole.log('テストです!');が実行される。
[データを変える処理の後で、wachを定義(immediateオプションがtrue)する]
new Vue({
  el: '#app',
  data: {
    width: 400,
    height: 600
  },
  methods: {
    change: function() {

      this.width = 400
      this.height = 400

      this.$watch(function() {
        [this.width, this.height]
      }, function() {
        console.log('テストです!');
      }, { deep: true, immediate: true });
    }
  },
  computed: {
    watchTarget: function() {
      return [this.width, this.height]
    }
  }
})
ブラウザでの初期表示は、以下のようになる。
gyazo.com
[チェンジ]ボタンをクリックした後のブラウザの表示は、以下のようになる。
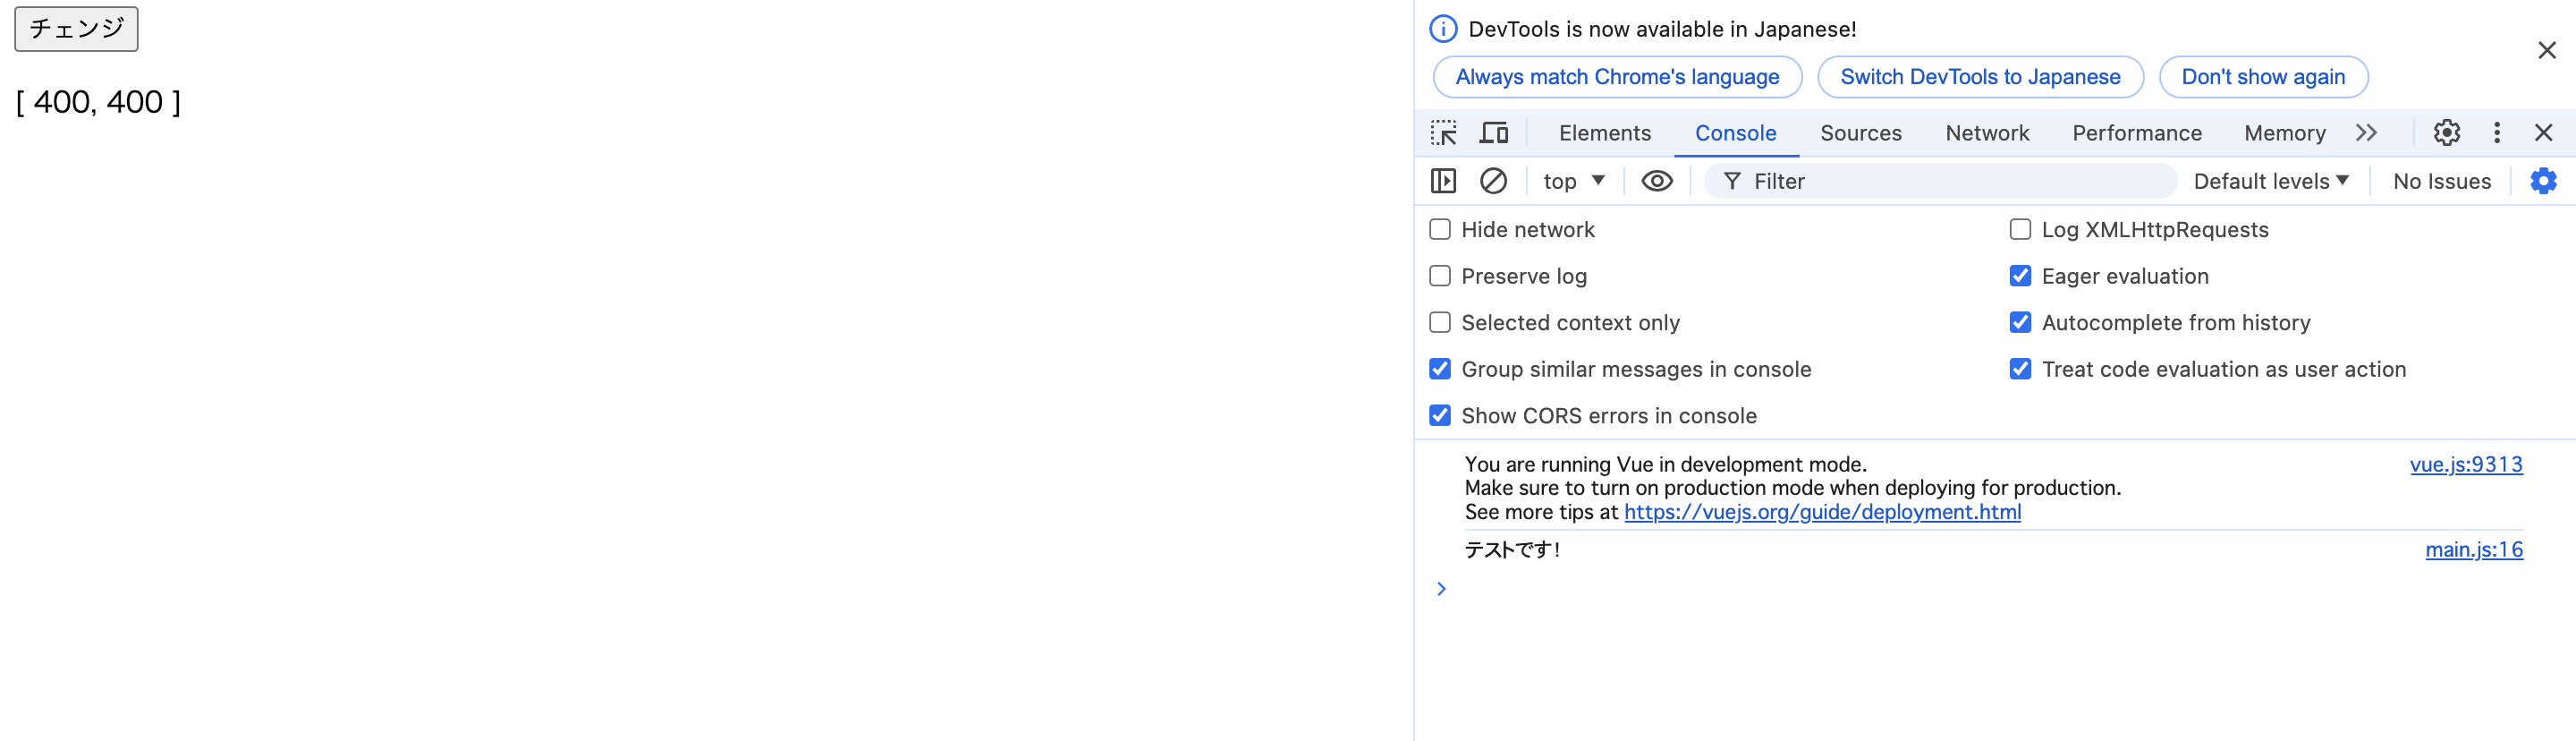 gyazo.com
※
処理の流れは、以下のようになっている。
①[チェンジ]ボタンをクリックした時にchangeメソッドの中に処理が入る。
↓
②watchで監視しているデータが変更されたが、watchを定義しているのはデータ変更の処理の後なので、データ変更時の発火分のconsole.log('テストです!');が実行されない。
↓
③watchで監視しているデータが変更されたので、changeメソッドが発火されconsole.log('テストです!');が実行される。
[wachを定義(immediateオプションがtrue)した後で、データを変える]
new Vue({
  el: '#app',
  data: {
    width: 400,
    height: 600
  },
  methods: {
    change: function() {
      this.$watch(function() {
        [this.width, this.height]
      }, function() {
        console.log('テストです!');
      }, { deep: true, immediate: true });

      this.width = 400
      this.height = 400
    }
  },
  computed: {
    watchTarget: function() {
      return [this.width, this.height]
    }
  }
})
ブラウザでの初期表示は、以下のようになる。
gyazo.com
[チェンジ]ボタンをクリックした後のブラウザの表示は、以下のようになる。
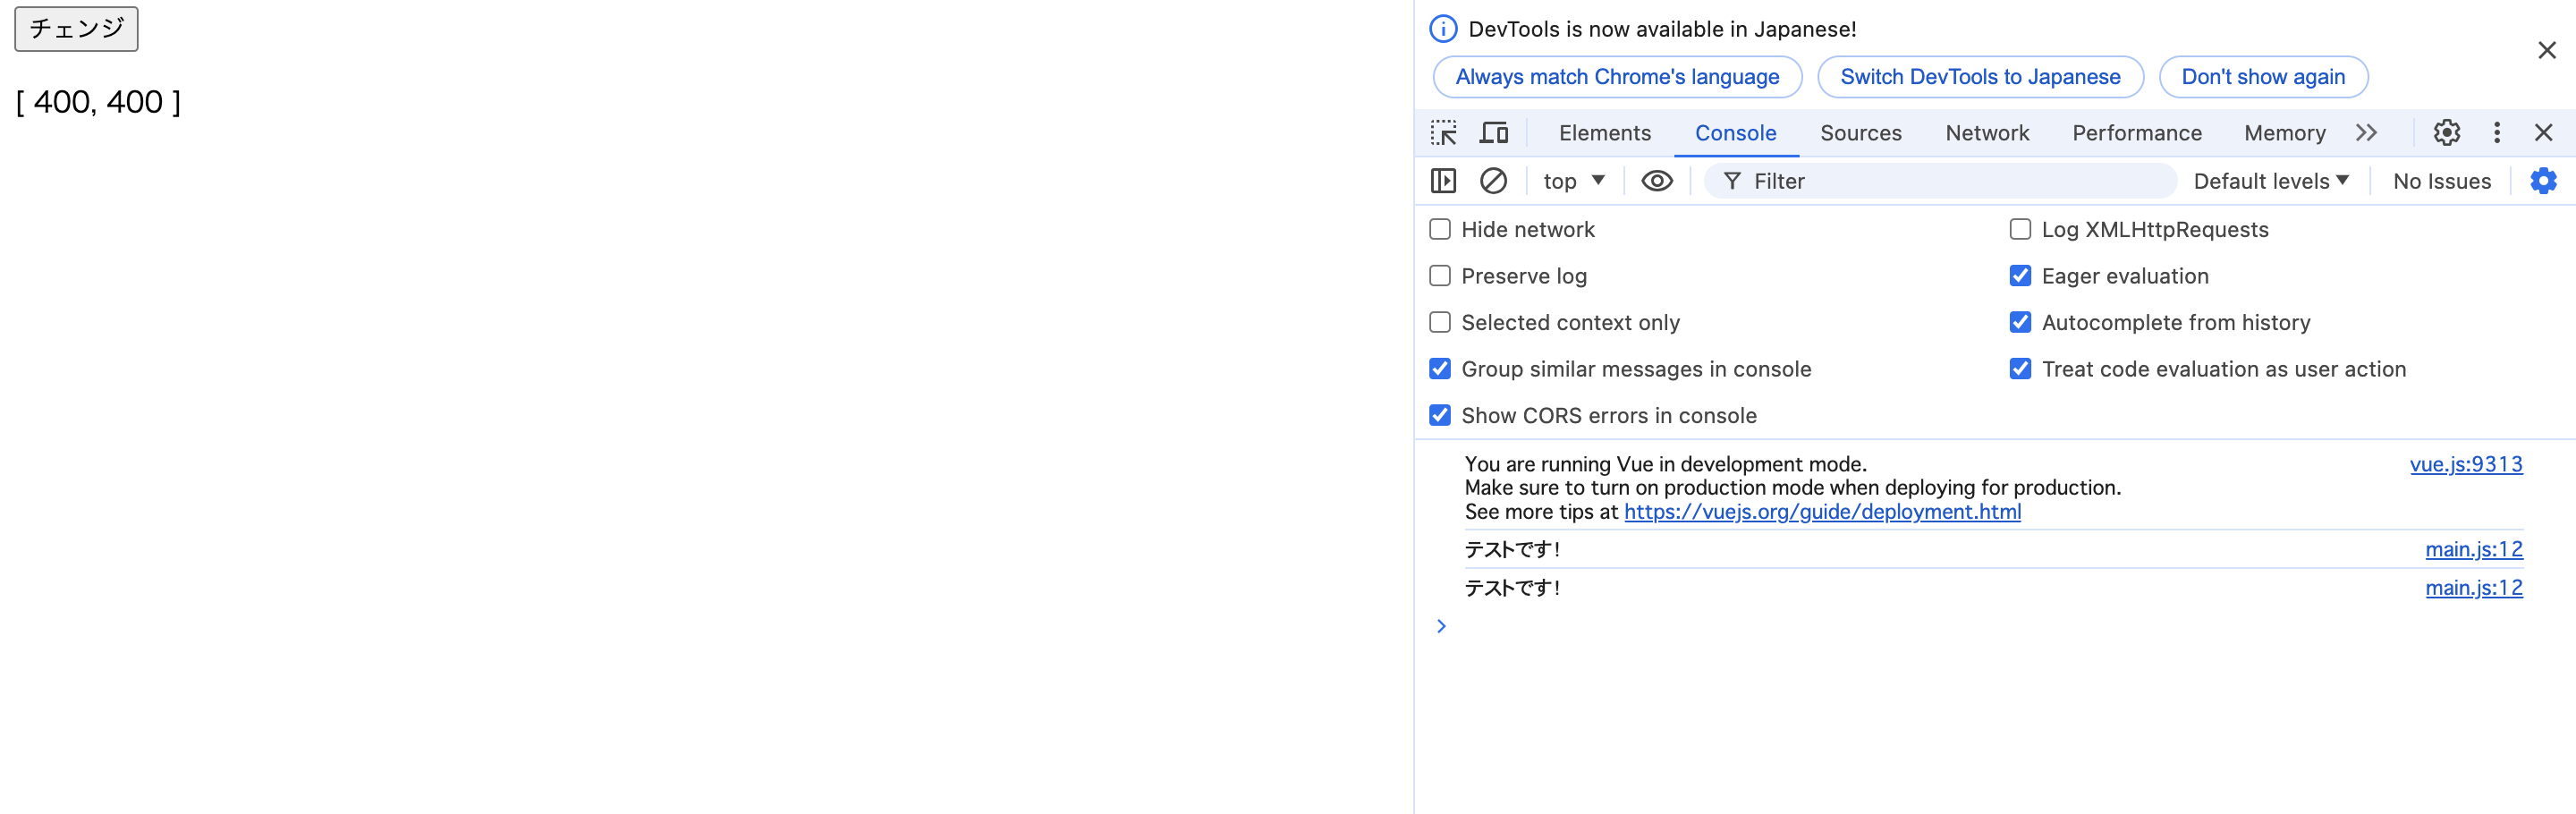
※
処理の流れは、以下のようになっている。
①[チェンジ]ボタンをクリックした時にchangeメソッドの中に処理が入る。
↓
②immediateオプションがtrueになってるので、console.log('テストです!');が実行される。(初回の1回目の時に実行される。)
↓
③watchで監視しているデータが変更されたので、changeメソッドが発火されconsole.log('テストです!');が実行される。
[wachを定義(deepオプションがfalse)した後で、データを変える]
new Vue({
  el: '#app',
  data: {
    width: 400,
    height: 600
  },
  methods: {
    change: function() {
      this.$watch(function() {
        [this.width, this.height]
      }, function() {
        console.log('テストです!');
      }, { deep: false, immediate: false });

      this.width = 400
      this.height = 400
    }
  },
  computed: {
    watchTarget: function() {
      return [this.width, this.height]
    }
})
ブラウザでの初期表示は、以下のようになる。
gyazo.com
[チェンジ]ボタンをクリックした後のブラウザの表示は、以下のようになる。
gyazo.com
※
処理の流れは、以下のようになっている。
①[チェンジ]ボタンをクリックした時にchangeメソッドの中に処理が入る。
↓
②watchで監視しているデータが変更されたが、監視対象を配列にして複数にしており、deepオプションがfalseになってるので、console.log('テストです!');が実行されない。
Dockerでmysqlのイメージのバージョンを8.0から5.7.44に下げたことによるエラー
Dockerでmysqlのイメージのバージョンを8.0から5.7.44に下げたらmysqlのコンテナが立ち上がらなくなってしまった。 Docker Desktopを確認すると以下のような状態であった。

Docker Desktopのmysqlコンテナのログを確認すると以下のようなエラーが出ていた。
2024-06-25 14:55:41 2024-06-25T05:55:41.376353Z 0 [ERROR] [FATAL] InnoDB: Table flags are 0 in the data dictionary but the flags in file ./ibdata1 are 0x4800!
2024-06-25 14:55:41 2024-06-25 14:55:41 0x7ffffbe5e880  InnoDB: Assertion failure in thread 140737419536512 in file ut0ut.cc line 921
2024-06-25 14:55:41 InnoDB: We intentionally generate a memory trap.
2024-06-25 14:55:41 InnoDB: Submit a detailed bug report to http://bugs.mysql.com.
2024-06-25 14:55:41 InnoDB: If you get repeated assertion failures or crashes, even
2024-06-25 14:55:41 InnoDB: immediately after the mysqld startup, there may be
2024-06-25 14:55:41 InnoDB: corruption in the InnoDB tablespace. Please refer to
2024-06-25 14:55:41 InnoDB: http://dev.mysql.com/doc/refman/5.7/en/forcing-innodb-recovery.html
2024-06-25 14:55:41 InnoDB: about forcing recovery.
2024-06-25 14:55:41 05:55:41 UTC - mysqld got signal 6 ;
2024-06-25 14:55:41 This could be because you hit a bug. It is also possible that this binary
2024-06-25 14:55:41 or one of the libraries it was linked against is corrupt, improperly built,
2024-06-25 14:55:41 or misconfigured. This error can also be caused by malfunctioning hardware.
2024-06-25 14:55:41 Attempting to collect some information that could help diagnose the problem.
2024-06-25 14:55:41 As this is a crash and something is definitely wrong, the information
2024-06-25 14:55:41 collection process might fail.
docker compose upを実行して、localhostにアクセスすると以下のような画面になった。

dockerのイメージ、コンテナ、volumeを削除すると解決できた。 具体的なコマンドと操作手順は、以下のようになる。
①コンテナの削除
docker ps -aでコンテナの一覧を表示する
上記で出てきたコンテナを以下のコマンドで全て削除する
docker rm コンテナID
②イメージの削除
docker imagesでイメージの一覧を表示する
上記で出てきたイメージを以下のコマンドで全て削除する
docker rmi イメージ名
③volumeの削除
docker volume lsでvolumeの一覧を表示する
上記で出てきたvolumeを以下のコマンドで全て削除する
docker volume rm VOLUMEのID
④buildのやり直し
docker-compose build --no-cache
⑤起動する
docker-compose up -d
mysqlのイメージのバージョンを8.0から5.7.44に下げたことで、InnoDBが8.0から4.7への移行をサポートしていなく今回のエラーになった可能性があります。
参考記事
HTML属性とDOMプロパティの違い
Vueのv-bind:valueとv-bind:value.propの違いが分からず、 それを理解するのにHTML属性とDOMプロパティの違いを理解する必要があったので備忘録として、記載します。
[v-bind:value]
HTML属性のバインドを行う
[v-bind:value.prop]
HTML属性ではなくDOMプロパティのバインディングを行う
ここで、HTML属性とDOMプロパティは、何が違うのかと疑問に思った。 具体的なイメージで理解するために以下にサンプルコードを記載する。
<!DOCTYPE html>
<html lang="en">
<head>
  <meta charset="UTF-8">
  <title>HTML Attributes vs DOM Properties</title>
</head>
<body>
  <input type="text" id="myInput" value="Hello">
  <button onclick="changeValue()">Change Value</button>
  <script>
    function changeValue() {
      var input = document.getElementById('myInput');

      // DOMプロパティを変更
      input.value = "Changed via DOM Property";

      // HTML属性を取得
      console.log(input.getAttribute('value')); // 出力: Hello

      // DOMプロパティを取得
      console.log(input.value); // 出力: Changed via DOM Property

      // HTML属性を変更
      input.setAttribute('value', 'Changed via HTML Attribute');

      // HTML属性を取得
      console.log(input.getAttribute('value')); // 出力: Changed via HTML Attribute
    }
  </script>
</body>
</html>
最初の表示では、以下のようになっている。(value="Hello"になっている)
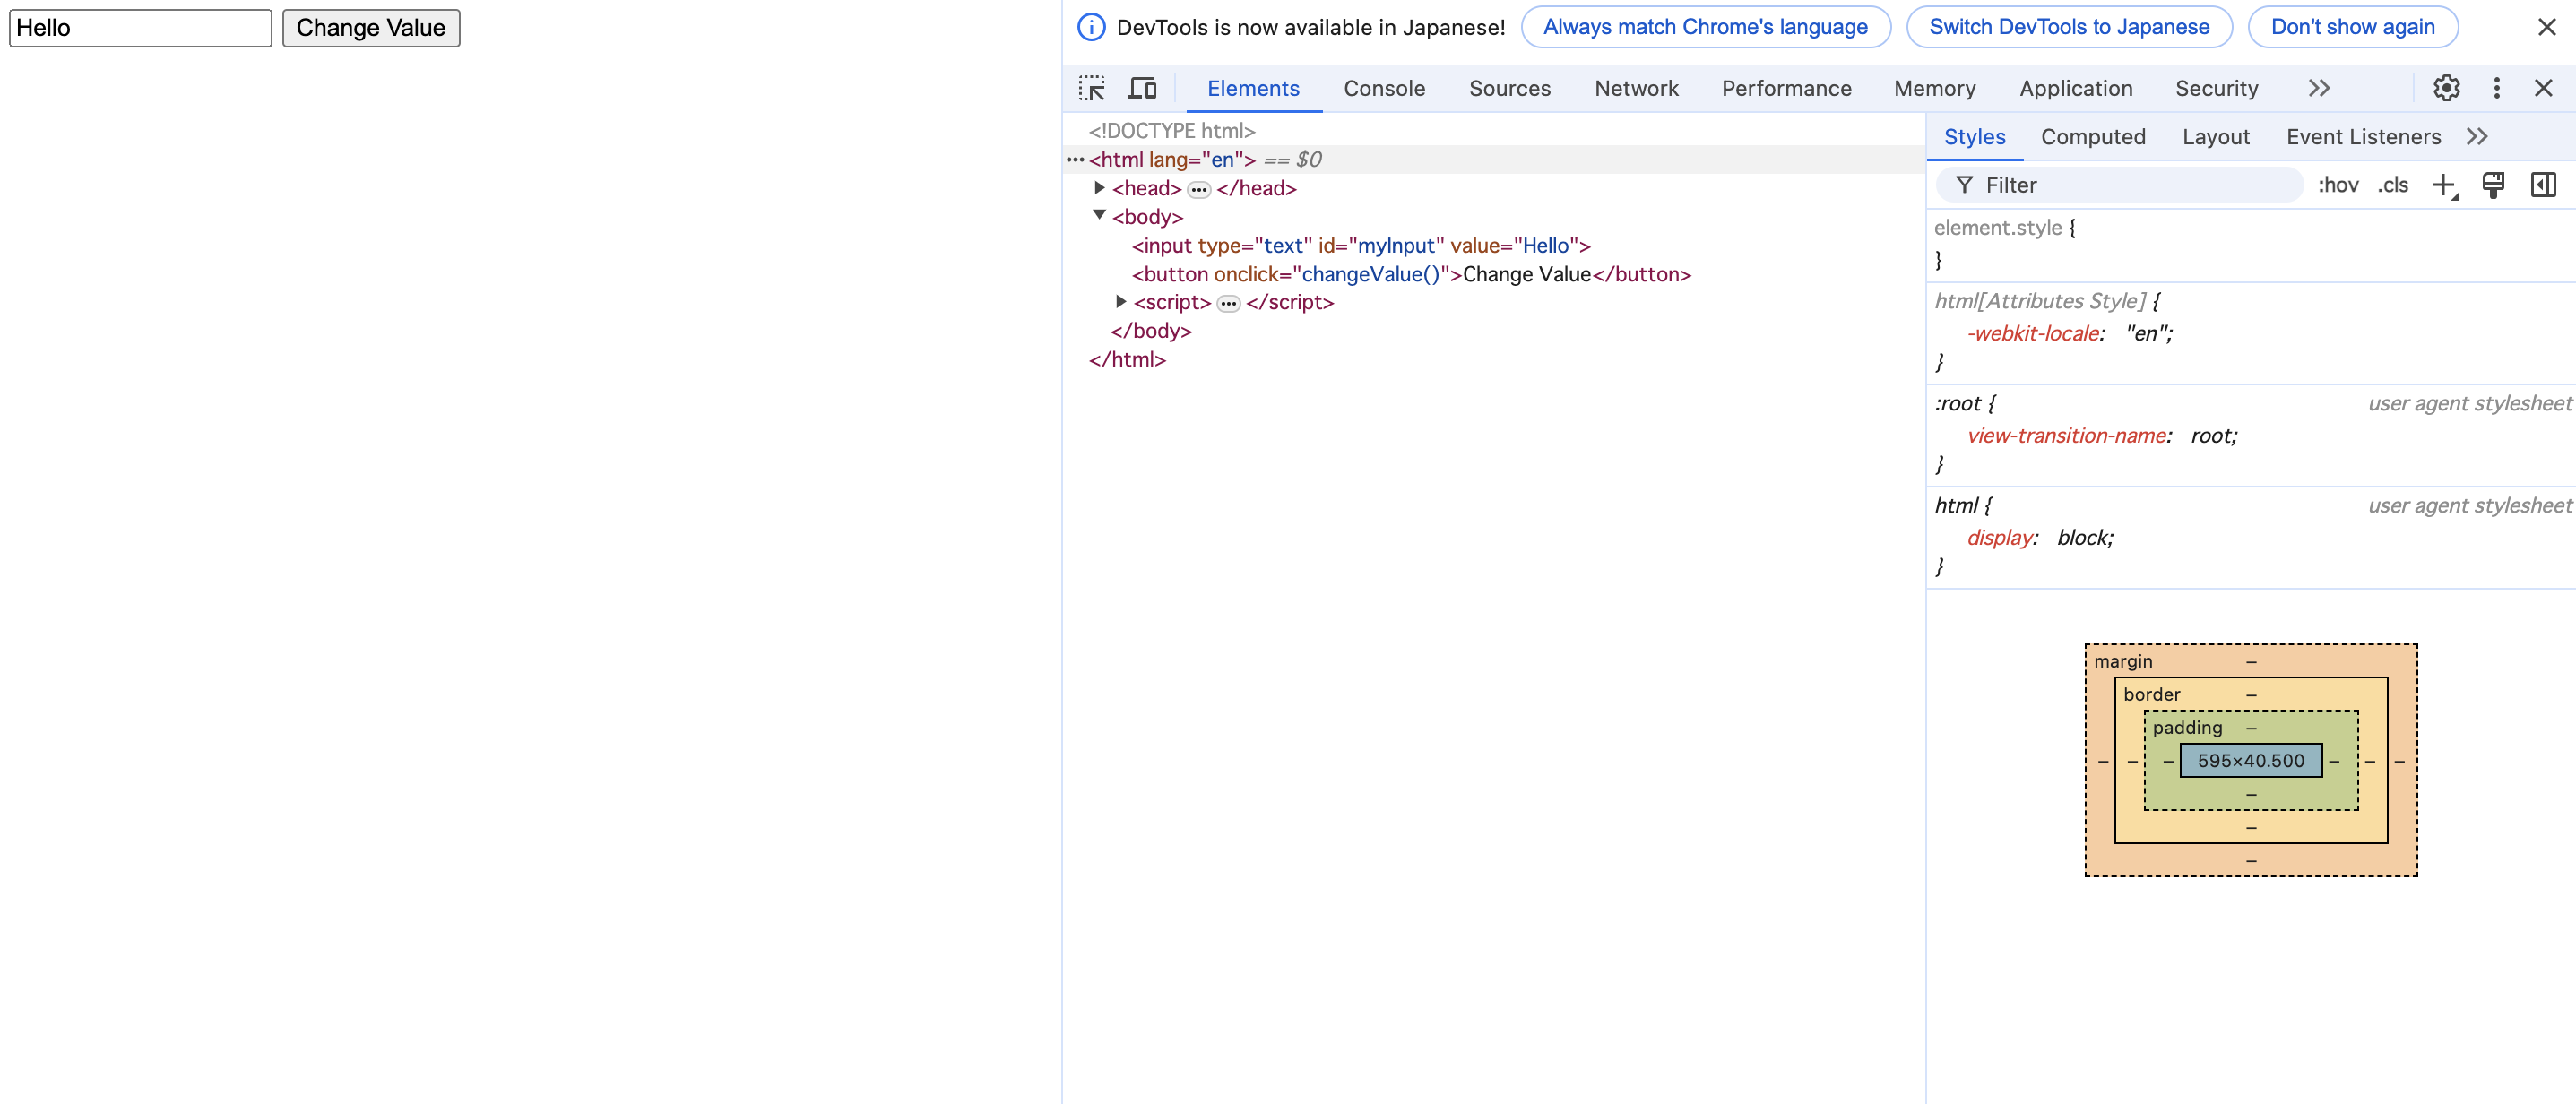 gyazo.com
[Change Value]ボタンをクリックすると以下のようになる。(value="Changed via HTML Attribute"になっている) これは、
input.setAttribute('value', 'Changed via HTML Attribute');
でHTML属性を変更しているため。 上記のようにHTML属性を変更する処理を記載しないと、画面表示は切り替わるがHTML属性は、切り替わらない。 DOMを変更するだけだと画面表示は切り替わるが、HTML属性は切り替わらない。

[v-bind:value]と[v-bind:value.prop]の違いがこれで分かったが、 以下の流れになるので結果としてVueでは、同じ挙動となる。
<!DOCTYPE html>
<html lang="en">
<head>
  <meta charset="UTF-8">
  <title>v-bind:value vs v-bind:value.prop Example</title>
  <script src="https://cdn.jsdelivr.net/npm/vue@2.7.11/dist/vue.js"></script>
</head>
<body>
  <div id="app">
    <input type="text" v-bind:value="message">
    <input type="text" v-bind:value.prop="message">
    <p>{{ message }}</p>
    <button @click="updateMessage">Update Message</button>
  </div>

  <script>
    var app = new Vue({
      el: '#app',
      data: {
        message: 'Hello, Vue.js!'
      },
      methods: {
        updateMessage: function() {
          this.message = 'Updated message!';
        }
      }
    });
  </script>
</body>
</html>
①ページが読み込まれると、input要素のvalue属性は"Hello"に設定される。
②[Update Message]ボタンをクリックすると、updateMessageメソッドが呼び出され、messageデータプロパティが"Updated message!"に更新される。
③プロパティが更新されたことで、再レンダリングされる。 再レンダリングされる時に、HTML属性は、value="Changed via HTML Attribute"になっているので、DOMプロパティもvalue="Changed via HTML Attribute"になる。
ポイント
- ページが表示される際に、HTML文書を読み込みHTMLの属性値に対応するDOMプロパティに初期値として設定される。
- JavaScriptを使用してDOMプロパティを変更すると、その変更は即座にUIに反映されるが、HTML属性は更新されない。
Vueのライフサイクルフック
Vueを勉強している時にライフサイクルフックの違いで少し悩んだので、調べたことを備忘録として記載します。
Vueのライフサイクルフックには、主に以下の8種類があります。
- beforeCreate
説明: インスタンスの初期化直前に呼ばれます。この時点ではデータやメソッドはまだセットアップされていません。
タイミング: インスタンスが作成される前。 - created
説明: インスタンスが作成された直後に呼ばれます。データやメソッドが利用可能です。
タイミング: インスタンスが作成された後。 - beforeMount
説明: テンプレートがDOMにマウントされる直前に呼ばれます。 タイミング: DOMにテンプレートがマウントされる前。 - mounted
説明: テンプレートがDOMにマウントされた直後に呼ばれます。この時点でDOMノードにアクセスできます。 タイミング: DOMにテンプレートがマウントされた後。 - beforeUpdate
説明: データが変更され、再描画が始まる直前に呼ばれます。 タイミング: データが変更されたが、DOMが再描画される前。 - updated
説明: データの変更による再描画が完了した後に呼ばれます。 タイミング: DOMが再描画された後。 - beforeDestroy
説明: インスタンスが破棄される直前に呼ばれます。この時点でまだインスタンスは利用可能です。 タイミング: インスタンスが破棄される前。 - destroyed
説明: インスタンスが破棄された後に呼ばれます。この時点でインスタンスのすべてのディレクティブがバインディング解除され、リスナーも削除されています。 タイミング: インスタンスが破棄された後。
それぞれのライフサイクルフックのイメージを具体的に掴むために以下に具体例を示します。
[index.html]

<!DOCTYPE html>
<html lang="en">
<head>
  <meta charset="UTF-8">
  <title>Vue.js App</title>
  <link href="main.css" rel="stylesheet">
  <script src="https://cdn.jsdelivr.net/npm/vue@2.7.11/dist/vue.js"></script>
</head>

<body>
  <div id="app">
    <p id="test">{{message}}</p>
    <button v-on:click="changeMessage">メッセージ変更</button>
  </div>

  <script src="main.js"></script>
</body>
</html>
[main.js]

var app = new Vue({
  el: '#app',
  data: {
    message: "初期値",
    show: "true"
  },
  methods: {
    changeMessage: function() {
      this.message = "変更後";
    }
  },

  beforeCreate() {
    console.log('beforeCreate:' + this.message);
  },
  created() {
    console.log('created:' + this.message);
  },
  beforeMount() {
    let dom = document.getElementById('test');
    console.log('beforeMount: ' + this.message);
    // beforeMountではDOM要素がまだ存在しないため、nullが返る
    console.log('beforeMount:', dom);
  },
  mounted() {
    let dom = document.getElementById('test');
    console.log('mounted: ' + this.message);
    // mountedではDOM要素が存在するため、取得できる
    console.log('mounted:', dom);
  },
  beforeUpdate() {
    let dom = document.getElementById('test')
    let innerText = dom.innerText
    console.log('beforeUpdate:' + innerText);
  },
  updated() {
    let dom = document.getElementById('test')
    let innerText = dom.innerText
    console.log('updated:' + innerText);
  }
})
最初にブラウザに表示され時点では、以下のようになっている。
 gyazo.com
[メッセージ変更]ボタンをクリックすると、以下のようになっている。
 gyazo.com
※
beforeDestroyとdestroyedに関しては、以下の注意欄に具体イメージを記載しています。
注意
beforeDestroyとdestroyedが呼ばれるタイミングに関して注意があります。 そもそもbeforeDestroyとdestroyedが呼ばれるタイミングとして、主に2つあります。
<!DOCTYPE html>
<html lang="en">
<head>
  <meta charset="UTF-8">
  <title>Vue Instance Destroy Example</title>
  <script src="https://cdn.jsdelivr.net/npm/vue@2.7.11/dist/vue.js"></script>
</head>
<body>
  <div id="app">
    <p>{{ message }}</p>
    <button @click="destroyInstance">Destroy Instance</button>
  </div>

  <script>
    const app = new Vue({
      el: '#app',
      data: {
        message: 'Hello, Vue.js!'
      },
      methods: {
        destroyInstance() {
          this.$destroy();
        }
      },
      beforeDestroy() {
        console.log('beforeDestroy: インスタンスが破棄される直前');
      },
      destroyed() {
        console.log('destroyed: インスタンスが破棄された後');
      }
    });
  </script>
</body>
</html>
- コンポーネントがDOMから削除される場合
<!DOCTYPE html>
<html lang="en">
<head>
  <meta charset="UTF-8">
  <title>Vue Component Destroy Example</title>
  <script src="https://cdn.jsdelivr.net/npm/vue@2.7.11/dist/vue.js"></script>
</head>
<body>
  <div id="app">
    <button @click="toggleComponent">Toggle Component</button>
    <child-component v-if="showComponent"></child-component>
  </div>

  <script>
    Vue.component('child-component', {
      template: '<div>Child Component</div>',
      beforeDestroy() {
        console.log('Child component beforeDestroy: コンポーネントが破棄される直前');
      },
      destroyed() {
        console.log('Child component destroyed: コンポーネントが破棄された後');
      }
    });

    new Vue({
      el: '#app',
      data: {
        showComponent: true
      },
      methods: {
        toggleComponent() {
          this.showComponent = !this.showComponent;
        }
      }
    });
  </script>
</body>
</html>
私は、コンポーネントがDOMから削除される場合のパターンでハマってしまった。 v-ifでDOMを削除すれば、beforeDestroyとdestroyedが呼ばれると認識していた。 以下のようなコードがあった時に[Domを削除]ボタンをクリックするとbeforeDestroyとdestroyedが呼ばれると思っていたが、beforeDestroyとdestroyedが呼ばれなかった。
[index.html]

<!DOCTYPE html>
<html lang="en">
<head>
  <meta charset="UTF-8">
  <title>Vue.js App</title>
  <link href="main.css" rel="stylesheet">
  <script src="https://cdn.jsdelivr.net/npm/vue@2.7.11/dist/vue.js"></script>
</head>

<body>
  <div id="app">
    <p v-if="show" id="test">{{message}}</p>
    <button v-on:click="destroyDom">Domを削除</button>
  </div>

  <script src="main.js"></script>
</body>
</html>
[main.js]

var app = new Vue({
  el: '#app',
  data: {
    message: "初期値",
    show: "true"
  },
  methods: {
    destroyDom: function() {
      this.show = false;
    }
  },

  beforeDestroy() {
    console.log('beforeDestroy: インスタンスが破棄される直前');
  },
  destroyed() {
    console.log('destroyed: インスタンスが破棄された後');
  }
})
正しい認識としては、ルートインスタンス(この場合#appにマウントされたインスタンス)に対してのv-ifでの非表示は、beforeDestroyとdestroyedは呼び出されません。 代わりに、子コンポーネントを使用してそのライフサイクルフックをトリガーします。 以下が実際の例になります。
[index.html]

<!DOCTYPE html>
<html lang="en">
<head>
  <meta charset="UTF-8">
  <title>Vue.js App</title>
  <link href="main.css" rel="stylesheet">
  <script src="https://cdn.jsdelivr.net/npm/vue@2.7.11/dist/vue.js"></script>
</head>

<body>
  <div id="app">
    <button v-on:click="toggleComponent">コンポーネント切り替え</button>
    <child-component v-if="showComponent"></child-component>
  </div>

  <script src="main.js"></script>
</body>
</html>
[main.js]

Vue.component('child-component', {
  template: `
    <div>
      <p v-if="show" id="test">{{ message }}</p>
      <button v-on:click="changeMessage">メッセージ変更</button>
      <button v-on:click="destroyDom">DOMを削除</button>
    </div>
  `,
  data() {
    return {
      message: "初期値",
      show: true
    };
  },
  methods: {
    changeMessage() {
      this.message = "変更後";
    },
    destroyDom() {
      this.show = false;
    }
  },
  beforeDestroy() {
    console.log('beforeDestroy: インスタンスが破棄される直前');
  },
  destroyed() {
    console.log('destroyed: インスタンスが破棄された後');
  }
});

var app = new Vue({
  el: '#app',
  data: {
    showComponent: true
  },
  methods: {
    toggleComponent() {
      this.showComponent = !this.showComponent;
    }
  },
  beforeCreate() {
    console.log('beforeCreate');
  },
  created() {
    console.log('created');
  },
  beforeMount() {
    console.log('beforeMount');
  },
  mounted() {
    console.log('mounted');
  },
  beforeDestroy() {
    console.log('beforeDestroy: インスタンスが破棄される直前');
  },
  destroyed() {
    console.log('destroyed: インスタンスが破棄された後');
  }
});
