JavaScriptのメソッドと使い方
JavaScriptのメソッドと使い方
セレクトボックスなどで選択したvalueの取得(e.target.valueの使い方)
[html]

<select class="search_form" name="q[fish_kind_eq]" id="q_fish_kind_eq">
  <option value="">魚の種類(必須)</option>
  <option value="アジ">アジ</option>
  <option value="マメアジ">マメアジ</option>
  <option value="イカ">イカ</option>
  <option value="サバ">サバ</option>
  <option value="マハゼ">マハゼ</option>
  <option value="カサゴ">カサゴ</option>
  <option value="タチウオ">タチウオ</option>
  <option value="カワハギ">カワハギ</option>
  <option value="イシモチ">イシモチ</option>
  <option value="メジナ">メジナ</option>
  <option value="タコ">タコ</option>
</select>
[JavaScript]

const genreSelect = document.getElementById('q_fish_kind_eq');

genreSelect.addEventListener('change', (e) => {
 console.log(e.target.value);
})

# セレクトボックスで[アジ]を選択した時の実行結果
=> アジ

# セレクトボックスで[タコ]を選択した時の実行結果
=> タコ

# セレクトボックスで[魚の種類(必須)]を選択した時の実行結果
=>
上記より[e.target.value]は、セレクトボックスで選択したvalueの値を取得できる。
取得したDOMの子要素を削除する方法(innerHTMLの使い方)
[HTML]

<select class="search_form" name="q[handle_pattern_eq]" id="q_handle_pattern_eq">
  <option value="">捌き方(任意)</option>
  <option value="背開き+ゼイゴの処理">背開き+ゼイゴの処理</option>
  <option value="3枚おろし+ゼイゴの処理">3枚おろし+ゼイゴの処理</option>
  <option value="内臓処理+ゼイゴの処理">内臓処理+ゼイゴの処理</option>
  <option value="3枚おろし+ゼイゴの処理+骨の処理+皮を剥ぐ">3枚おろし+ゼイゴの処理+骨の処理+皮を剥ぐ</option>
  <option value="3枚おろし+ゼイゴの処理+骨の処理">3枚おろし+ゼイゴの処理+骨の処理</option>
</select>
[JavaScript]

const selectHandlePattern = document.getElementById('q_handle_pattern_eq');
selectHandlePattern.innerHTML = '';
上記のように記述すると[selectHandlePattern]の子要素であるセレクトボックス内の[option]要素が全て削除される。
参考記事
JavaScriptでセレクトボックスの値を動的に生成する方法を現役エンジニアが解説【初心者向け】 | TechAcademyマガジン
JavaScriptでDOM操作で要素を削除する方法を現役エンジニアが解説【初心者向け】 | TechAcademyマガジン
不可算名詞をモデルやテーブルに使う場合の注意点
不可算名詞をモデルやテーブルに使う場合の注意点
アプリケーション開発中にモデル名やテーブル名に不可算名詞を使う機会があり、そこで少しハマったのでこちらに対処方法をまとめます。
[fish]というモデル名で[fishes]というテーブル名を付けたい場合に、モデルファイルとスキーマファイルを以下のようにしました。
[app/models/fish.rb]

class Fish < ApplicationRecord
end
[db/schema.rb]

  create_table "fishes", options: "ENGINE=InnoDB DEFAULT CHARSET=utf8mb4", force: :cascade do |t|
    t.string "kind", null: false
    t.datetime "created_at", precision: 6, null: false
    t.datetime "updated_at", precision: 6, null: false
    t.index ["kind"], name: "index_fishes_on_kind", unique: true
  end
[rails c]でFishモデルを使おうとすると以下のようなエラーになってしまいました。
$ rails c
Loading development environment (Rails 6.0.4.1)
irb(main):001:0> Fish.all
  Fish Load (0.4ms)  SELECT `fish`.* FROM `fish` LIMIT 11
Traceback (most recent call last):
ActiveRecord::StatementInvalid (Mysql2::Error: Table 'fishing_cooking_development.fish' doesn't exist)
fishテーブルがありませんとなってしまいます。
スキーマファイルに[fishes]と記載しており、Mysqlにも[fishes]テーブルがあるのに、なぜか[fish]テーブルを使おうとする。。。
これは、railsがモデル名から使用するテーブル名を予測していることによる原因でした。
通常railsは、モデル名を単数系で記述してテーブル名を複数形で記述することにより、使うテーブルをrailsが予測してくれますが、今回のように[fish]という不可算名詞を使用すると、railsは、テーブル名も[fish]というテーブル名を使用しようとします。
[fish]の場合は、1種類の魚がたくさんいる場合は複数形も[fish]になりますが、たくさんの種類の魚という場合には、複数形は[fishes]となります。
上記のことからrailsは、[fish]の複数形は[fish]と解釈して[fish]というテーブルを使おうとしていました。
railsの複数形、単数系の判断は以下のコマンドで調べることができます
irb(main):001:0> "fish".pluralize      #[fish]の複数形を調べる
=> "fish"
irb(main):002:0> "fishes".singularize   #[fishes]の単数系を調べる
=> "fish"
今回のようにモデル名を[fish]でテーブル名を[fishes]にしたい場合は、以下のように設定することでイレギュラー設定をすることができます。
ActiveSupport::Inflector.inflections(:en) do |inflect|
  inflect.irregular 'fish', 'fishes'
end
上記を記述後に再度railsの単数系と複数形の判断を確認すると以下のようになります。
irb(main):001:0> "fish".pluralize
=> "fishes"
irb(main):002:0> "fishes".singularize
=> "fish"
irb(main):003:0> Fish.all
  Fish Load (1.8ms)  SELECT `fishes`.* FROM `fishes` LIMIT 11
=> #<ActiveRecord::Relation []>
上記のようにFishのActiveRecordも使えるようになりました。
参考記事
Active Recordのモデル名が異なっているエラー
Active Recordのモデル名が異なっているエラー
Active Record関連でハマってしまったことがあった為、こちらにまとめます
rails c実行時に以下のようにエラーになってしまいました。
$ rails c
Loading development environment (Rails 6.0.4.1)

irb(main):002:0> FishHandleInformation.first
Traceback (most recent call last):
        1: from (irb):2
NameError (uninitialized constant FishHandleInformation)
Did you mean?  FishHandleInfomation
[FishHandleInformation]というモデル名に対して、[first]というクラスメソッドを使いましたが、
Did you mean? FishHandleInfomation
上記のように言われてしまい、[FishHandleInfomation]というモデル名じゃ無いですか?と記述されている
提案されているモデル名は、[r]が抜けている
モデル名を確認してみると以下のようになっており、[rails c]で実行したモデル名と一緒でした
[app/models/fish_handle_infomation.rb]

class FishHandleInformation < ApplicationRecord
  belongs_to :fish
  belongs_to :handle
  validates :fish_id, uniqueness: { scope: :handle_id }
  validates :handle_time, presence: true
  validates :handle_url, presence: true
end
念の為、[schema.rb]を確認してみると以下のようになっておりrailsの定義通りのテーブル名になっているので、問題がなさそう
[db/schema.rb]

  create_table "cooking_informations", options: "ENGINE=InnoDB DEFAULT CHARSET=utf8mb4", force: :cascade do |t|
    t.bigint "cooking_id", null: false
    t.bigint "fish_id", null: false
    t.string "image"
    t.integer "cooking_time", null: false
    t.string "cooking_url"
    t.bigint "handle_id", null: false
    t.datetime "created_at", precision: 6, null: false
    t.datetime "updated_at", precision: 6, null: false
    t.index ["cooking_id"], name: "index_cooking_informations_on_cooking_id"
    t.index ["fish_id"], name: "index_cooking_informations_on_fish_id"
    t.index ["handle_id"], name: "index_cooking_informations_on_handle_id"
  end
色々と調べてみると、ファイル名が以下のようになっていた([r]が抜けていた)

正しくは、[fish_handle_information.rb]になる
ファイル名を[fish_handle_information.rb]に直したら、以下のように[rails c]で正しくActive Recordが使えるようになった
$ rails c
Loading development environment (Rails 6.0.4.1)

irb(main):001:0> FishHandleInformation.first
  FishHandleInformation Load (0.4ms)  SELECT `fish_handle_informations`.* FROM `fish_handle_informations` ORDER BY `fish_handle_informations`.`id` ASC LIMIT 1
=> nil
恐らくActive Recordを使う時は、モデル名だけでなくファイル名も関係するということだろう
Herokuでのデプロイ
Herokuでのデプロイ
Herokuでのデプロイの際にハマった事があったので、こちらにまとめます
Herokuでデプロイする際に以下のようにエラーになってしまい、プラットフォームが違うとなってしまいました。
higmonta@higuchimiyukiyuunoMacBook-Pro heroku_deploy % git push heroku master
Enumerating objects: 130, done.
Counting objects: 100% (130/130), done.
Delta compression using up to 8 threads
Compressing objects: 100% (113/113), done.
Writing objects: 100% (130/130), 146.38 KiB | 5.42 MiB/s, done.
Total 130 (delta 3), reused 0 (delta 0), pack-reused 0
remote: Compressing source files... done.
remote: Building source:
remote:
remote: -----> Building on the Heroku-20 stack
remote: -----> Determining which buildpack to use for this app
remote:  !     Warning: Multiple default buildpacks reported the ability to handle this app. The first buildpack in the list below will be used.
remote:                         Detected buildpacks: Ruby,Node.js
remote:                         See https://devcenter.heroku.com/articles/buildpacks#buildpack-detect-order
remote: -----> Ruby app detected
remote: -----> Installing bundler 2.2.21
remote: -----> Removing BUNDLED WITH version in the Gemfile.lock
remote: -----> Compiling Ruby/Rails
remote: -----> Using Ruby version: ruby-3.0.0
remote: -----> Installing dependencies using bundler 2.2.21
remote:        Running: BUNDLE_WITHOUT='development:test' BUNDLE_PATH=vendor/bundle BUNDLE_BIN=vendor/bundle/bin BUNDLE_DEPLOYMENT=1 bundle install -j4
remote:        Your bundle only supports platforms ["x86_64-darwin-20"] but your local platform
remote:        is x86_64-linux. Add the current platform to the lockfile with `bundle lock
remote:        --add-platform x86_64-linux` and try again.
remote:        Bundler Output: Your bundle only supports platforms ["x86_64-darwin-20"] but your local platform
remote:        is x86_64-linux. Add the current platform to the lockfile with `bundle lock
remote:        --add-platform x86_64-linux` and try again.
remote:
remote:  !
remote:  !     Failed to install gems via Bundler.
remote:  !
remote:  !     Push rejected, failed to compile Ruby app.
remote:
remote:  !     Push failed
remote:  !
remote:  ! ## Warning - The same version of this code has already been built: 7b817d45a55e0f304231fb6d1f156b63a20750c7
remote:  !
remote:  ! We have detected that you have triggered a build from source code with version 7b817d45a55e0f304231fb6d1f156b63a20750c7
remote:  ! at least twice. One common cause of this behavior is attempting to deploy code from a different branch.
remote:  !
remote:  ! If you are developing on a branch and deploying via git you must run:
remote:  !
remote:  !     git push heroku <branchname>:main
remote:  !
remote:  ! This article goes into details on the behavior:
remote:  !   https://devcenter.heroku.com/articles/duplicate-build-version
remote:
remote: Verifying deploy...
remote:
remote: !       Push rejected to heroku-assignment-higmonta.
remote:
To https://git.heroku.com/heroku-assignment-higmonta.git
 ! [remote rejected] master -> master (pre-receive hook declined)
error: failed to push some refs to 'https://git.heroku.com/heroku-assignment-higmonta.git'

higmonta@higuchimiyukiyuunoMacBook-Pro heroku_deploy % bundle lock --add-platform x86_64-linux
Fetching gem metadata from https://rubygems.org/............
Writing lockfile to /Users/higmonta/workspace/runteq/application_tasks/heroku_deploy/Gemfile.lock

higmonta@higuchimiyukiyuunoMacBook-Pro heroku_deploy % bundle
Using rake 13.0.6
Using concurrent-ruby 1.1.9
Using i18n 1.8.10
Using minitest 5.14.4
Using tzinfo 2.0.4
Using zeitwerk 2.4.2
Using activesupport 6.1.4.1
Using builder 3.2.4
Using erubi 1.10.0
Using racc 1.5.2
Using nokogiri 1.12.4 (x86_64-darwin)
Using rails-dom-testing 2.0.3
Using crass 1.0.6
Using loofah 2.12.0
Using rails-html-sanitizer 1.4.2
Using actionview 6.1.4.1
Using rack 2.2.3
Using rack-test 1.1.0
Using actionpack 6.1.4.1
Using nio4r 2.5.8
Using websocket-extensions 0.1.5
Using websocket-driver 0.7.5
Using actioncable 6.1.4.1
Using globalid 0.5.2
Using activejob 6.1.4.1
Using activemodel 6.1.4.1
Using activerecord 6.1.4.1
Using marcel 1.0.1
Using mini_mime 1.1.1
Using activestorage 6.1.4.1
Using mail 2.7.1
Using actionmailbox 6.1.4.1
Using actionmailer 6.1.4.1
Using actiontext 6.1.4.1
Using public_suffix 4.0.6
Using addressable 2.8.0
Using bindex 0.8.1
Using msgpack 1.4.2
Using bootsnap 1.8.1
Using bundler 2.2.3
Using byebug 11.1.3
Using regexp_parser 2.1.1
Using xpath 3.2.0
Using capybara 3.35.3
Using childprocess 3.0.0
Using ffi 1.15.4
Using jbuilder 2.11.2
Using rb-fsevent 0.11.0
Using rb-inotify 0.10.1
Using listen 3.7.0
Using method_source 1.0.0
Using puma 5.4.0
Using rack-mini-profiler 2.3.3
Using rack-proxy 0.7.0
Using thor 1.1.0
Using railties 6.1.4.1
Using sprockets 4.0.2
Using sprockets-rails 3.2.2
Using rails 6.1.4.1
Using rubyzip 2.3.2
Using sassc 2.4.0
Using tilt 2.0.10
Using sassc-rails 2.1.2
Using sass-rails 6.0.0
Using selenium-webdriver 3.142.7
Using semantic_range 3.0.0
Using spring 3.0.0
Using sqlite3 1.4.2
Using turbolinks-source 5.2.0
Using turbolinks 5.2.1
Using web-console 4.1.0
Using webdrivers 4.6.1
Using webpacker 5.4.3
Bundle complete! 18 Gemfile dependencies, 73 gems now installed.
Gems in the group production were not installed.
Use `bundle info [gemname]` to see where a bundled gem is installed.

higmonta@higuchimiyukiyuunoMacBook-Pro heroku_deploy % git push heroku master
Enumerating objects: 130, done.
Counting objects: 100% (130/130), done.
Delta compression using up to 8 threads
Compressing objects: 100% (113/113), done.
Writing objects: 100% (130/130), 146.38 KiB | 6.10 MiB/s, done.
Total 130 (delta 3), reused 0 (delta 0), pack-reused 0
remote: Compressing source files... done.
remote: Building source:
remote:
remote: -----> Building on the Heroku-20 stack
remote: -----> Determining which buildpack to use for this app
remote:  !     Warning: Multiple default buildpacks reported the ability to handle this app. The first buildpack in the list below will be used.
remote:                         Detected buildpacks: Ruby,Node.js
remote:                         See https://devcenter.heroku.com/articles/buildpacks#buildpack-detect-order
remote: -----> Ruby app detected
remote: -----> Installing bundler 2.2.21
remote: -----> Removing BUNDLED WITH version in the Gemfile.lock
remote: -----> Compiling Ruby/Rails
remote: -----> Using Ruby version: ruby-3.0.0
remote: -----> Installing dependencies using bundler 2.2.21
remote:        Running: BUNDLE_WITHOUT='development:test' BUNDLE_PATH=vendor/bundle BUNDLE_BIN=vendor/bundle/bin BUNDLE_DEPLOYMENT=1 bundle install -j4
remote:        Your bundle only supports platforms ["x86_64-darwin-20"] but your local platform
remote:        is x86_64-linux. Add the current platform to the lockfile with `bundle lock   ①
remote:        --add-platform x86_64-linux` and try again.
remote:        Bundler Output: Your bundle only supports platforms ["x86_64-darwin-20"] but your local platform
remote:        is x86_64-linux. Add the current platform to the lockfile with `bundle lock
remote:        --add-platform x86_64-linux` and try again.
remote:
remote:  !
remote:  !     Failed to install gems via Bundler.
remote:  !
remote:  !     Push rejected, failed to compile Ruby app.
remote:
remote:  !     Push failed
remote:  !
remote:  ! ## Warning - The same version of this code has already been built: 7b817d45a55e0f304231fb6d1f156b63a20750c7
remote:  !
remote:  ! We have detected that you have triggered a build from source code with version 7b817d45a55e0f304231fb6d1f156b63a20750c7
remote:  ! at least twice. One common cause of this behavior is attempting to deploy code from a different branch.
remote:  !
remote:  ! If you are developing on a branch and deploying via git you must run:
remote:  !
remote:  !     git push heroku <branchname>:main
remote:  !
remote:  ! This article goes into details on the behavior:
remote:  !   https://devcenter.heroku.com/articles/duplicate-build-version
remote:
remote: Verifying deploy...
remote:
remote: !       Push rejected to heroku-assignment-higmonta.
remote:
To https://git.heroku.com/heroku-assignment-higmonta.git
 ! [remote rejected] master -> master (pre-receive hook declined)
error: failed to push some refs to 'https://git.heroku.com/heroku-assignment-higmonta.git'

higmonta@higuchimiyukiyuunoMacBook-Pro heroku_deploy % git status
On branch master
Changes not staged for commit:
  (use "git add <file>..." to update what will be committed)
  (use "git restore <file>..." to discard changes in working directory)
        modified:   Gemfile.lock

no changes added to commit (use "git add" and/or "git commit -a")

higmonta@higuchimiyukiyuunoMacBook-Pro heroku_deploy % git add .

higmonta@higuchimiyukiyuunoMacBook-Pro heroku_deploy % git commit -m "Fix プラットフォームの変更"
[master 1a1a870] Fix プラットフォームの変更
 1 file changed, 3 insertions(+)

higmonta@higuchimiyukiyuunoMacBook-Pro heroku_deploy % git push heroku master
Enumerating objects: 133, done.
Counting objects: 100% (133/133), done.
Delta compression using up to 8 threads
Compressing objects: 100% (116/116), done.
Writing objects: 100% (133/133), 147.20 KiB | 4.91 MiB/s, done.
Total 133 (delta 4), reused 0 (delta 0), pack-reused 0
remote: Compressing source files... done.
remote: Building source:
remote:
remote: -----> Building on the Heroku-20 stack
remote: -----> Determining which buildpack to use for this app
remote:  !     Warning: Multiple default buildpacks reported the ability to handle this app. The first buildpack in the list below will be used.
remote:                         Detected buildpacks: Ruby,Node.js
remote:                         See https://devcenter.heroku.com/articles/buildpacks#buildpack-detect-order
remote: -----> Ruby app detected
remote: -----> Installing bundler 2.2.21
remote: -----> Removing BUNDLED WITH version in the Gemfile.lock
remote: -----> Compiling Ruby/Rails
remote: -----> Using Ruby version: ruby-3.0.0
remote: -----> Installing dependencies using bundler 2.2.21
remote:        Running: BUNDLE_WITHOUT='development:test' BUNDLE_PATH=vendor/bundle BUNDLE_BIN=vendor/bundle/bin BUNDLE_DEPLOYMENT=1 bundle install -j4
remote:        Fetching gem metadata from https://rubygems.org/
remote:        Fetching gem metadata from https://rubygems.org/............
remote:        Fetching rake 13.0.6
remote:        Installing rake 13.0.6
remote:        Fetching concurrent-ruby 1.1.9
remote:        Fetching minitest 5.14.4
remote:        Fetching zeitwerk 2.4.2
remote:        Fetching builder 3.2.4
remote:        Installing builder 3.2.4
remote:        Installing zeitwerk 2.4.2
remote:        Fetching erubi 1.10.0
remote:        Installing minitest 5.14.4
remote:        Installing concurrent-ruby 1.1.9
remote:        Installing erubi 1.10.0
remote:        Fetching racc 1.5.2
remote:        Fetching crass 1.0.6
remote:        Fetching rack 2.2.3
remote:        Installing crass 1.0.6
remote:        Installing racc 1.5.2 with native extensions
remote:        Installing rack 2.2.3
remote:        Fetching nio4r 2.5.8
remote:        Installing nio4r 2.5.8 with native extensions
remote:        Fetching websocket-extensions 0.1.5
remote:        Fetching marcel 1.0.1
remote:        Installing websocket-extensions 0.1.5
remote:        Installing marcel 1.0.1
remote:        Fetching mini_mime 1.1.1
remote:        Installing mini_mime 1.1.1
remote:        Fetching msgpack 1.4.2
remote:        Installing msgpack 1.4.2 with native extensions
remote:        Using bundler 2.2.21
remote:        Fetching ffi 1.15.4
remote:        Installing ffi 1.15.4 with native extensions
remote:        Fetching method_source 1.0.0
remote:        Installing method_source 1.0.0
remote:        Fetching pg 1.2.3
remote:        Installing pg 1.2.3 with native extensions
remote:        Fetching thor 1.1.0
remote:        Installing thor 1.1.0
remote:        Fetching tilt 2.0.10
remote:        Installing tilt 2.0.10
remote:        Fetching semantic_range 3.0.0
remote:        Installing semantic_range 3.0.0
remote:        Fetching turbolinks-source 5.2.0
remote:        Installing turbolinks-source 5.2.0
remote:        Fetching i18n 1.8.10
remote:        Installing i18n 1.8.10
remote:        Fetching tzinfo 2.0.4
remote:        Installing tzinfo 2.0.4
remote:        Fetching rack-test 1.1.0
remote:        Installing rack-test 1.1.0
remote:        Fetching rack-proxy 0.7.0
remote:        Installing rack-proxy 0.7.0
remote:        Fetching sprockets 4.0.2
remote:        Installing sprockets 4.0.2
remote:        Fetching websocket-driver 0.7.5
remote:        Installing websocket-driver 0.7.5 with native extensions
remote:        Fetching mail 2.7.1
remote:        Installing mail 2.7.1
remote:        Fetching nokogiri 1.12.4 (x86_64-linux)
remote:        Installing nokogiri 1.12.4 (x86_64-linux)
remote:        Fetching puma 5.4.0
remote:        Installing puma 5.4.0 with native extensions
remote:        Fetching turbolinks 5.2.1
remote:        Installing turbolinks 5.2.1
remote:        Fetching activesupport 6.1.4.1
remote:        Installing activesupport 6.1.4.1
remote:        Fetching loofah 2.12.0
remote:        Installing loofah 2.12.0
remote:        Fetching bootsnap 1.8.1
remote:        Installing bootsnap 1.8.1 with native extensions
remote:        Fetching rails-dom-testing 2.0.3
remote:        Installing rails-dom-testing 2.0.3
remote:        Fetching globalid 0.5.2
remote:        Installing globalid 0.5.2
remote:        Fetching activemodel 6.1.4.1
remote:        Installing activemodel 6.1.4.1
remote:        Fetching jbuilder 2.11.2
remote:        Installing jbuilder 2.11.2
remote:        Fetching rails-html-sanitizer 1.4.2
remote:        Installing rails-html-sanitizer 1.4.2
remote:        Fetching activejob 6.1.4.1
remote:        Installing activejob 6.1.4.1
remote:        Fetching activerecord 6.1.4.1
remote:        Installing activerecord 6.1.4.1
remote:        Fetching actionview 6.1.4.1
remote:        Installing actionview 6.1.4.1
remote:        Fetching actionpack 6.1.4.1
remote:        Installing actionpack 6.1.4.1
remote:        Fetching actioncable 6.1.4.1
remote:        Installing actioncable 6.1.4.1
remote:        Fetching activestorage 6.1.4.1
remote:        Installing activestorage 6.1.4.1
remote:        Fetching actionmailer 6.1.4.1
remote:        Installing actionmailer 6.1.4.1
remote:        Fetching railties 6.1.4.1
remote:        Installing railties 6.1.4.1
remote:        Fetching sprockets-rails 3.2.2
remote:        Installing sprockets-rails 3.2.2
remote:        Fetching actionmailbox 6.1.4.1
remote:        Installing actionmailbox 6.1.4.1
remote:        Fetching actiontext 6.1.4.1
remote:        Installing actiontext 6.1.4.1
remote:        Fetching webpacker 5.4.3
remote:        Installing webpacker 5.4.3
remote:        Fetching rails 6.1.4.1
remote:        Installing rails 6.1.4.1
remote:        Fetching sassc 2.4.0
remote:        Installing sassc 2.4.0 with native extensions
remote:        Fetching sassc-rails 2.1.2
remote:        Installing sassc-rails 2.1.2
remote:        Fetching sass-rails 6.0.0
remote:        Installing sass-rails 6.0.0
remote:        Bundle complete! 18 Gemfile dependencies, 56 gems now installed.
remote:        Gems in the groups 'development' and 'test' were not installed.
remote:        Bundled gems are installed into `./vendor/bundle`
remote:        Bundle completed (141.95s)
remote:        Cleaning up the bundler cache.
remote: -----> Installing node-v12.16.2-linux-x64
remote: -----> Installing yarn-v1.22.4
remote: -----> Detecting rake tasks
remote: -----> Preparing app for Rails asset pipeline
remote:        Running: rake assets:precompile
remote:        yarn install v1.22.4
remote:        [1/4] Resolving packages...
remote:        [2/4] Fetching packages...
remote:        info fsevents@2.3.2: The platform "linux" is incompatible with this module.
remote:        info "fsevents@2.3.2" is an optional dependency and failed compatibility check. Excluding it from installation.
remote:        info fsevents@1.2.13: The platform "linux" is incompatible with this module.
remote:        info "fsevents@1.2.13" is an optional dependency and failed compatibility check. Excluding it from installation.
remote:        [3/4] Linking dependencies...
remote:        [4/4] Building fresh packages...
remote:        Done in 23.77s.
remote:        I, [2021-09-17T14:47:38.770279 #1321]  INFO -- : Writing /tmp/build_1c7270dc/public/assets/manifest-b4bf6e57a53c2bdb55b8998cc94cd00883793c1c37c5e5aea3ef6749b4f6d92b.js
remote:        I, [2021-09-17T14:47:38.770620 #1321]  INFO -- : Writing /tmp/build_1c7270dc/public/assets/manifest-b4bf6e57a53c2bdb55b8998cc94cd00883793c1c37c5e5aea3ef6749b4f6d92b.js.gz
remote:        I, [2021-09-17T14:47:38.770904 #1321]  INFO -- : Writing /tmp/build_1c7270dc/public/assets/application-04c3ae28f07e1bf734223bf526d0cdd296440ef53bcb3f80b9f093c6bf02f747.css
remote:        I, [2021-09-17T14:47:38.771086 #1321]  INFO -- : Writing /tmp/build_1c7270dc/public/assets/application-04c3ae28f07e1bf734223bf526d0cdd296440ef53bcb3f80b9f093c6bf02f747.css.gz
remote:        I, [2021-09-17T14:47:38.771329 #1321]  INFO -- : Writing /tmp/build_1c7270dc/public/assets/boards-04024382391bb910584145d8113cf35ef376b55d125bb4516cebeb14ce788597.css
remote:        I, [2021-09-17T14:47:38.771505 #1321]  INFO -- : Writing /tmp/build_1c7270dc/public/assets/boards-04024382391bb910584145d8113cf35ef376b55d125bb4516cebeb14ce788597.css.gz
remote:        I, [2021-09-17T14:47:38.771745 #1321]  INFO -- : Writing /tmp/build_1c7270dc/public/assets/scaffolds-04c3ae28f07e1bf734223bf526d0cdd296440ef53bcb3f80b9f093c6bf02f747.css
remote:        I, [2021-09-17T14:47:38.771933 #1321]  INFO -- : Writing /tmp/build_1c7270dc/public/assets/scaffolds-04c3ae28f07e1bf734223bf526d0cdd296440ef53bcb3f80b9f093c6bf02f747.css.gz
remote:        Compiling...
remote:        Compiled all packs in /tmp/build_1c7270dc/public/packs
remote:        Hash: 0a072893f38dc3f88c56
remote:        Version: webpack 4.46.0
remote:        Time: 5770ms
remote:        Built at: 09/17/2021 2:47:46 PM
remote:                                                Asset       Size  Chunks                         Chunk Names
remote:               js/application-6f8d1c44357d365c38a4.js   69.4 KiB       0  [emitted] [immutable]  application
remote:            js/application-6f8d1c44357d365c38a4.js.br   15.3 KiB          [emitted]
remote:            js/application-6f8d1c44357d365c38a4.js.gz   17.8 KiB          [emitted]
remote:           js/application-6f8d1c44357d365c38a4.js.map    205 KiB       0  [emitted] [dev]        application
remote:        js/application-6f8d1c44357d365c38a4.js.map.br   43.9 KiB          [emitted]
remote:        js/application-6f8d1c44357d365c38a4.js.map.gz   50.9 KiB          [emitted]
remote:                                        manifest.json  364 bytes          [emitted]
remote:                                     manifest.json.br  127 bytes          [emitted]
remote:                                     manifest.json.gz  142 bytes          [emitted]
remote:        Entrypoint application = js/application-6f8d1c44357d365c38a4.js js/application-6f8d1c44357d365c38a4.js.map
remote:        [0] (webpack)/buildin/module.js 552 bytes {0} [built]
remote:        [4] ./app/javascript/packs/application.js 480 bytes {0} [built]
remote:        [5] ./app/javascript/channels/index.js 205 bytes {0} [built]
remote:        [6] ./app/javascript/channels sync _channel\.js$ 160 bytes {0} [built]
remote:            + 3 hidden modules
remote:
remote:        Asset precompilation completed (34.23s)
remote:        Cleaning assets
remote:        Running: rake assets:clean
remote: -----> Detecting rails configuration
remote:
remote: ###### WARNING:
remote:
remote:        There is a more recent Ruby version available for you to use:
remote:
remote:        3.0.2
remote:
remote:        The latest version will include security and bug fixes. We always recommend
remote:        running the latest version of your minor release.
remote:
remote:        Please upgrade your Ruby version.
remote:
remote:        For all available Ruby versions see:
remote:          https://devcenter.heroku.com/articles/ruby-support#supported-runtimes
remote:
remote: ###### WARNING:
remote:
remote:        No Procfile detected, using the default web server.
remote:        We recommend explicitly declaring how to boot your server process via a Procfile.
remote:        https://devcenter.heroku.com/articles/ruby-default-web-server
remote:
remote:
remote: -----> Discovering process types
remote:        Procfile declares types     -> (none)
remote:        Default types for buildpack -> console, rake, web
remote:
remote: -----> Compressing...
remote:        Done: 77.6M
remote: -----> Launching...
remote:        Released v6
remote:        https://heroku-assignment-higmonta.herokuapp.com/ deployed to Heroku
remote:
remote: Verifying deploy... done.
To https://git.heroku.com/heroku-assignment-higmonta.git
 * [new branch]      master -> master
①のエラー文より、bundleとlocalでプラットフォームが違うとのことです。
[bundle lock --add-platform x86_64-linux]を実行しろとなっているので、実行し[bundle install]したところ、以下のように[Gemfile.lock]にプラットフォームの記述が追加されました。

[git add .]でステージングして、[git commit]でコミットしてから再度[git push heroku master]でpushするとデプロイができました。
### 参考記事
【Rails】Bundler 2.2.x以降は開発者が適切なプラットフォームを追加する必要がある - AUTOVICE
【Rails】Bundler 2.2.x以降は開発者が適切なプラットフォームを追加する必要がある - AUTOVICE
ネットワークとIPアドレス
ネットワークとIPアドレス
ネットワークとIPアドレスについて勉強したので、こちらにまとめます
ネットワーク: コンピューター同士が通信するための環境や設備のこと
ネットワークは、LANがいくつか存在し、そのLAN同士がゲートウェイと呼ばれる中継機(ルーターなど)を通って接続できる仕組み
IPアドレス: ネットワークにおけるコンピューターの住所であり、ネットワークに接続されているコンピュータは必ずIPアドレスを持っており、通信をする際には必ずIPアドレスを指定する
IPアドレスの規格には、従来ののIPv4と、新しいIPv6がある(これは、IPv4の規格だとIPアドレスが足りなくなった為IPv6ができた)
IPアドレスには、グローバルIPアドレスとプライベートIPアドレスがある
グローバルIPアドレスは、インターネットで外部のネットワークに接続する際に必要になり、プライベートIPアドレスはLANの中で必要になる
ここからは、実際に検証しながらIPアドレスやネットワークの使われ方を感じてもらいます
まず、WiFiに接続しているパソコンで以下のサイトにアクセスするとグローバルIPアドレスが確認できます
通常は、同じLANに属していれば同じグローバルIPアドレスが表示されるので、上記で試したパソコンに接続されているのと同じWiFiにスマホを接続して、上記のサイトにアクセスすると同じグローバルIPアドレスが表示されます
なぜWiFiに接続されている端末が同じグローバルIPアドレスを使って、それぞれの端末毎にインターネットが使えるかというと、実は、LAN内のパソコンやスマホはグローバルIPアドレスがありません
LAN内のパソコンやスマホは、ゲートウェイ(ルーター)のグローバルIPアドレスを借りてインターネットに接続しています
LAN内の端末は、ゲートウェイ(ルーター)のグローバルIPアドレスを借りてインターネットに接続し、LAN内のプライベートIPアドレスで識別することで、どの端末でインターネットにアクセスしたかを区別しています
LAN内でプライベートIPアドレスで区別しているのも、ルーターの仕事です
以下でパソコンのプライベートIPアドレスが確認できます
ターミナルで、以下のように実行してネットワークハードウェアを確認します
今回は、WiFiを使用しているの[en0]というデバイスにプライベートIPアドレスが割り当てられている
$ networksetup -listallhardwareports

Hardware Port: Ethernet Adaptor (en3)
Device: en3
Ethernet Address: 1e:00:ea:1e:4d:28

Hardware Port: Ethernet Adaptor (en4)
Device: en4
Ethernet Address: 1e:00:ea:1e:4d:29

Hardware Port: Wi-Fi
Device: en0
Ethernet Address: 50:ed:3c:04:e2:c0

Hardware Port: Thunderbolt 1
Device: en1
Ethernet Address: 36:20:5e:6d:01:00

Hardware Port: Thunderbolt 1
Device: en2
Ethernet Address: 36:20:5e:6d:01:04

Hardware Port: Thunderbolt Bridge
Device: bridge0
Ethernet Address: 36:20:5e:6d:01:00
上記を実行後以下でプライベートIPアドレスが確認できる
$ ifconfig [デバイス名]   # 今回の場合は、[ifconfig en0]で実行する

en0: flags=8863<UP,BROADCAST,SMART,RUNNING,SIMPLEX,MULTICAST> mtu 1500
    options=400<CHANNEL_IO>
    ether 50:ed:3c:04:e2:c0
    inet6 fe80::819:d834:5775:12a3%en0 prefixlen 64 secured scopeid 0x9
    inet6 240b:12:2ae1:d300:18b3:f506:1aaa:5d43 prefixlen 64 autoconf secured
    inet6 240b:12:2ae1:d300:c853:34c7:c414:9cdc prefixlen 64 deprecated autoconf temporary
    inet 192.168.10.103 netmask 0xffffff00 broadcast 192.168.10.255    # ここがプライベートIPアドレス(今回の場合は、192.168.10.103)
    inet6 240b:12:2ae1:d300:944d:11f4:c125:5efb prefixlen 64 deprecated autoconf temporary
    inet6 240b:12:2ae1:d300:71c5:f3f7:5dcd:bf42 prefixlen 64 deprecated autoconf temporary
    inet6 240b:12:2ae1:d300:718f:defe:df7c:6a64 prefixlen 64 deprecated autoconf temporary
    inet6 240b:12:2ae1:d300:87a:dc64:f549:c8ae prefixlen 64 deprecated autoconf temporary
    inet6 240b:12:2ae1:d300:3d10:f4b4:7133:2309 prefixlen 64 autoconf temporary
    nd6 options=201<PERFORMNUD,DAD>
    media: autoselect
    status: active
ちなみに同一のLANに属していれば、プライベートIPアドレスを使った通信もできる
以下に例を示します
railsでサーバーを起動する時に、以下のようにオプションをつけてサーバーを起動する
$ rails s -b 0.0.0.0
パソコンと同じWiFiにスマホを接続して、スマホに以下のURLを打ち込むとスマホでもRailsのアプリケーションが開ける
http://[パソコンのプライベートIPアドレス]:3000
同じLANの中なので、プライベートIPアドレスを指定することで、LANの中のどの端末にアクセスするかを特定でき、ポート番号3000を使うことで、どのポートで接続するかを指定できるのでスマホからでもアクセスできる
次にIPアドレスの形式について説明します
IPアドレスには、どのネットワークに属しているかという[ネットワーク部]と、ネットワーク内の端末を識別するための[ホスト部]という情報があります
[ネットワーク部]と[ホスト部]の区切りを表記する方法として、[サブネットマスク]と[CIDR]の2つがあります
まずIPアドレスは、32ビットのデータで構成されています
[192.168.10.104]のようなIPアドレスがあった場合は、これは10進数での表記になりますが、本来は以下のように2進数の32ビットのデータになっています
192.168.10.104   # 10進数での表記

11000000.10101000.00001010.01101000    # 2進数の表記(32ビットになっており、8ビットずつで区切ってある)
それでは、サブネットマスク表記について説明します
IPアドレスは2進数で表記した際に、先頭からN桁目までの数字が[ネットワーク部]、それ以降が[ホスト部]となっており、ネットワーク部はどのネットワークに属しているか、ホスト部はネットワーク内のどの端末かを示しています

上記のようになっている場合でのサブネットマスクでの[ネットワーク部]と[ホスト部]の識別を説明します
(上記のようにスマホにこのように表示されている部分は、プライベートIPアドレスです)
この情報からプライベートIPアドレスを[ネットワーク部]と[ホスト部]で区別するためには、2進数に変換する必要があります
プライベートIPアドレス
192.168.10.104  # 10進数での表記
11000000.10101000.00001010.01101000    # 2真数での表記

サブネットマスク
255.255.255.0   # 10進数での表記
11111111.11111111.11111111.00000000  # 2進数での表記
上記のようにサブネットマスクは、24桁目までが1となっており、これはプライベートIPアドレスの24桁目までが[ネットワーク部]ということになります
つまり、以下のようになります
プライベートIPアドレス
192.168.10.104

ネットワーク部
192.168.10

ホスト部
104
CIDR表記について説明します
サブネットマスクだと、いちいち2進数に変換したりなど面倒くさい割に結局何桁目までが[ネットワーク部]かという情報が分かればそれで十分ということからCIDR表記ができた
CIDR表記は、以下のようになる
192.168.10.104/24

# [192.168.10.104]というIPアドレスの24桁目までが[ネットワーク部]という意味
Sequel Proについて
Sequel Proについて
データベースの中身がどのようになっているかや、データベースの操作をGUIで見やすくした[Sequel Pro]というツールがあります
今回は、[Sequel Pro]ツールの基本的な使い方をこちらにまとめます
以下のようなアイコンが[Sequel Pro]ツールになるので、クリックします

↓
クリックすると以下のような画面になります
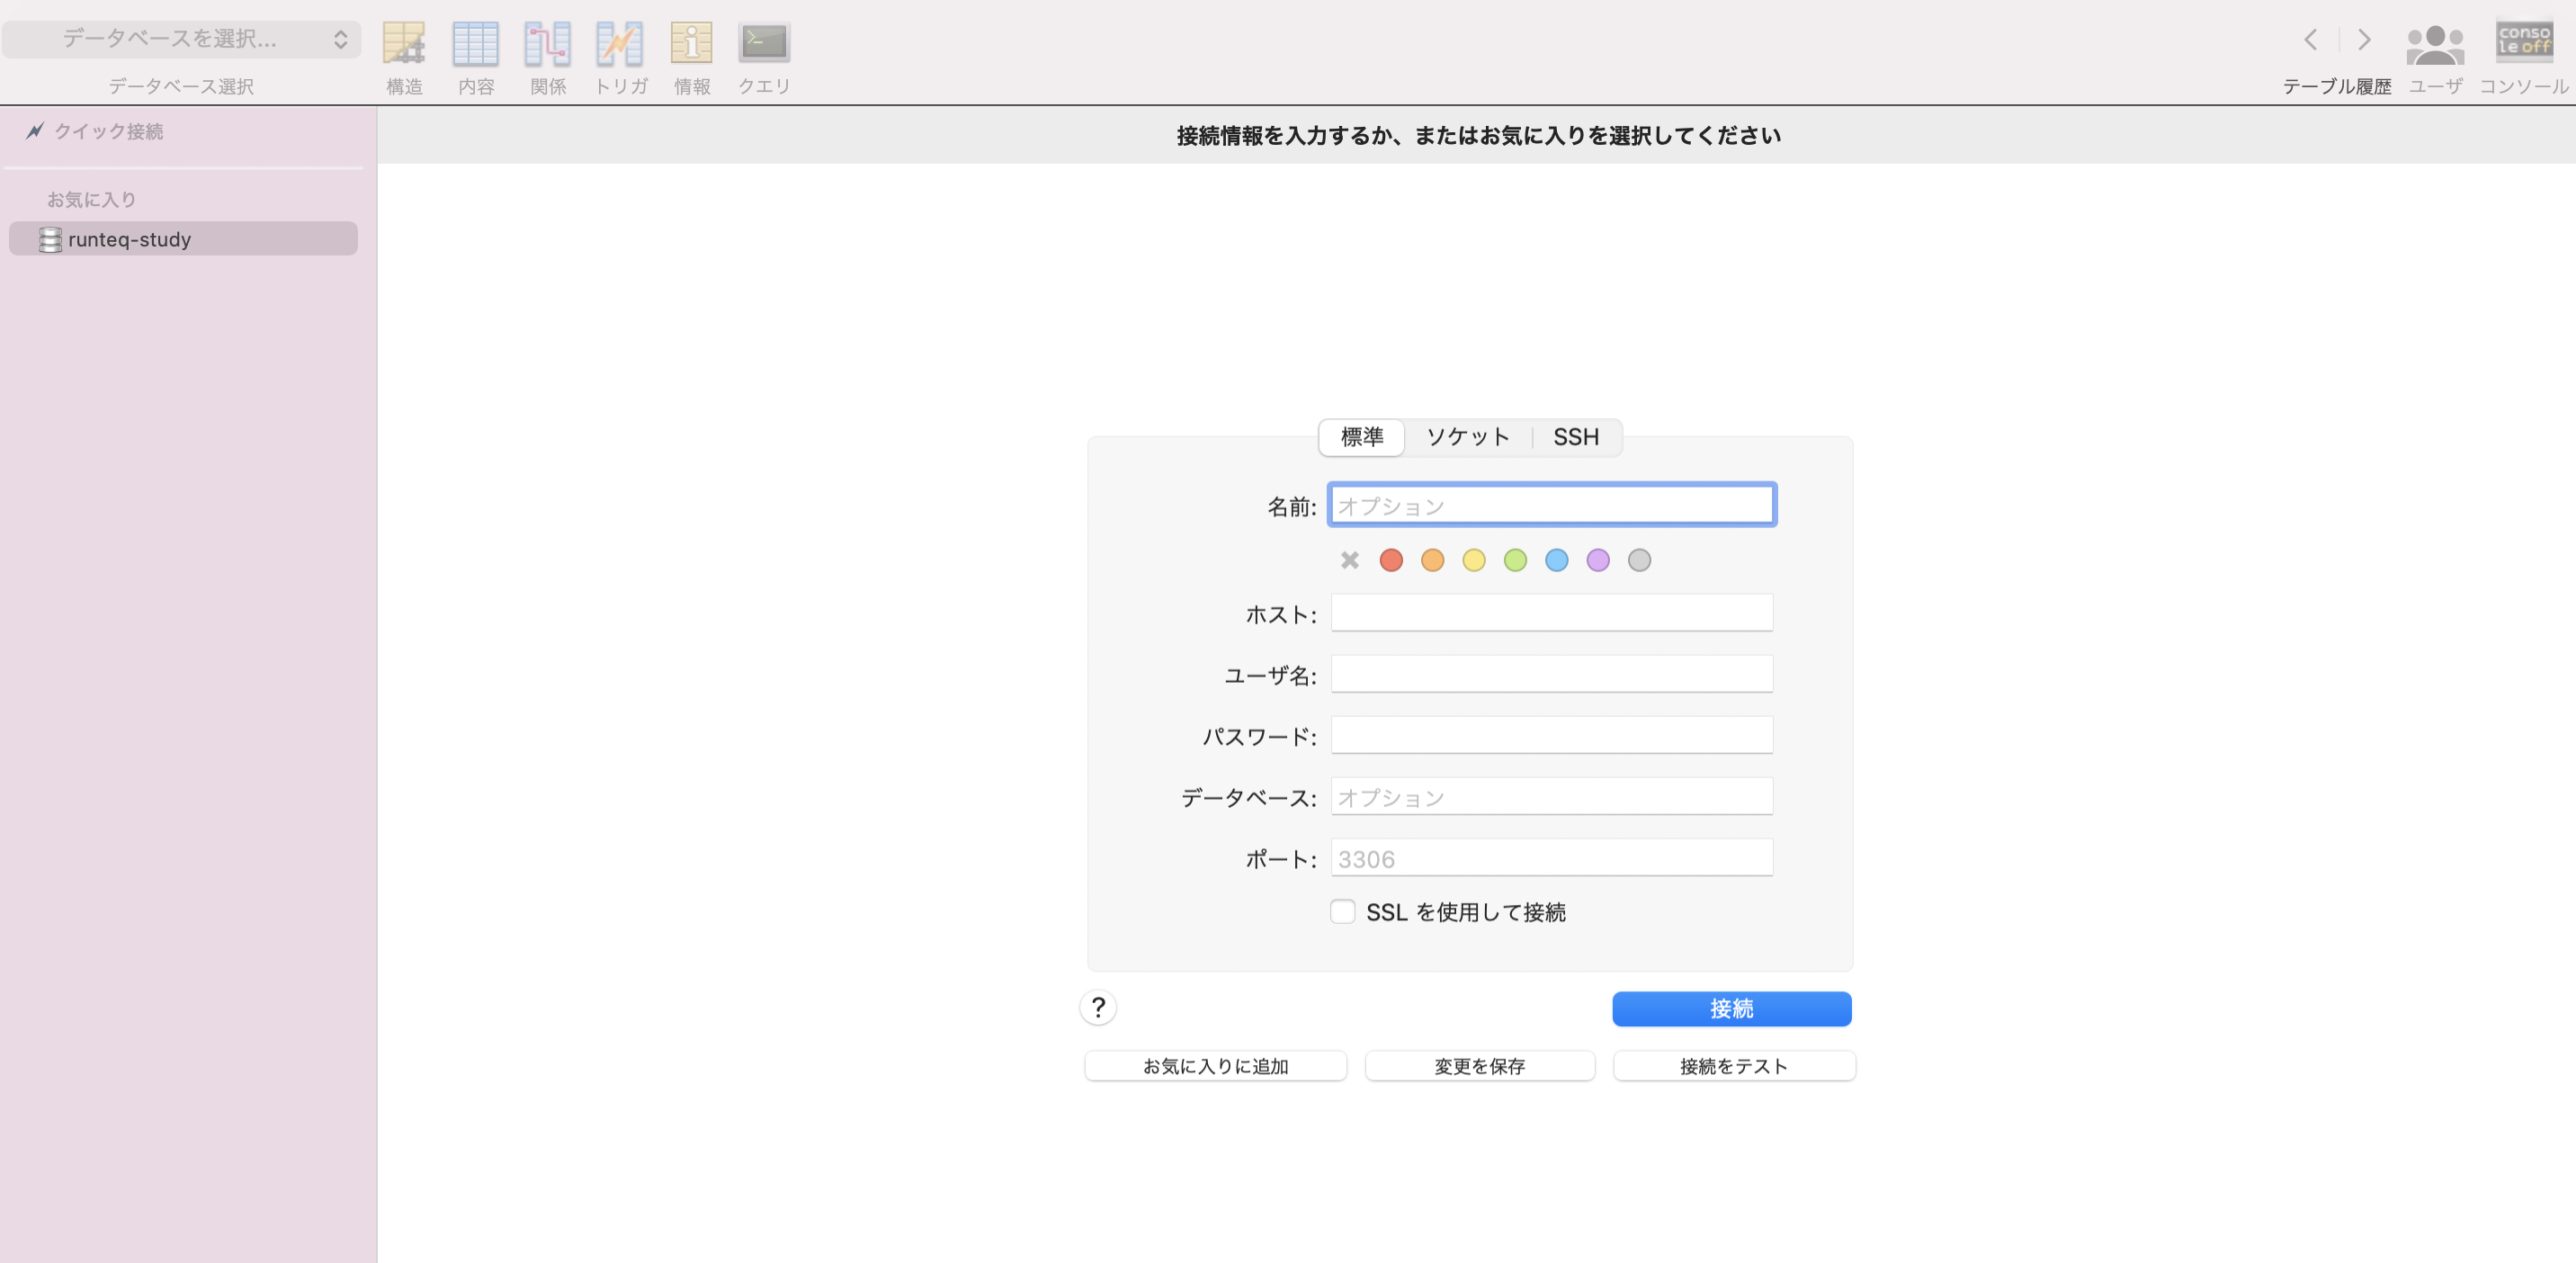
↓
上記の画面の左下に以下のような部分があり、これの[+]ボタンをクリックする

↓
入力できるようになるので、好きな名前を入力する(データベースをこのツールで開く時のファイルの名前)
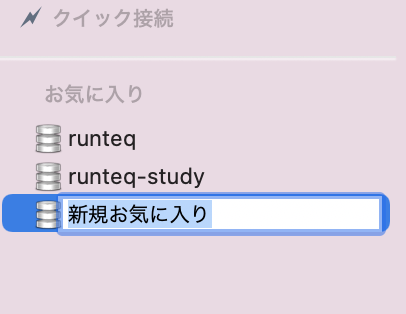
↓
上記で名前を入力すると、下記のように名前の欄にオートで入ってくる
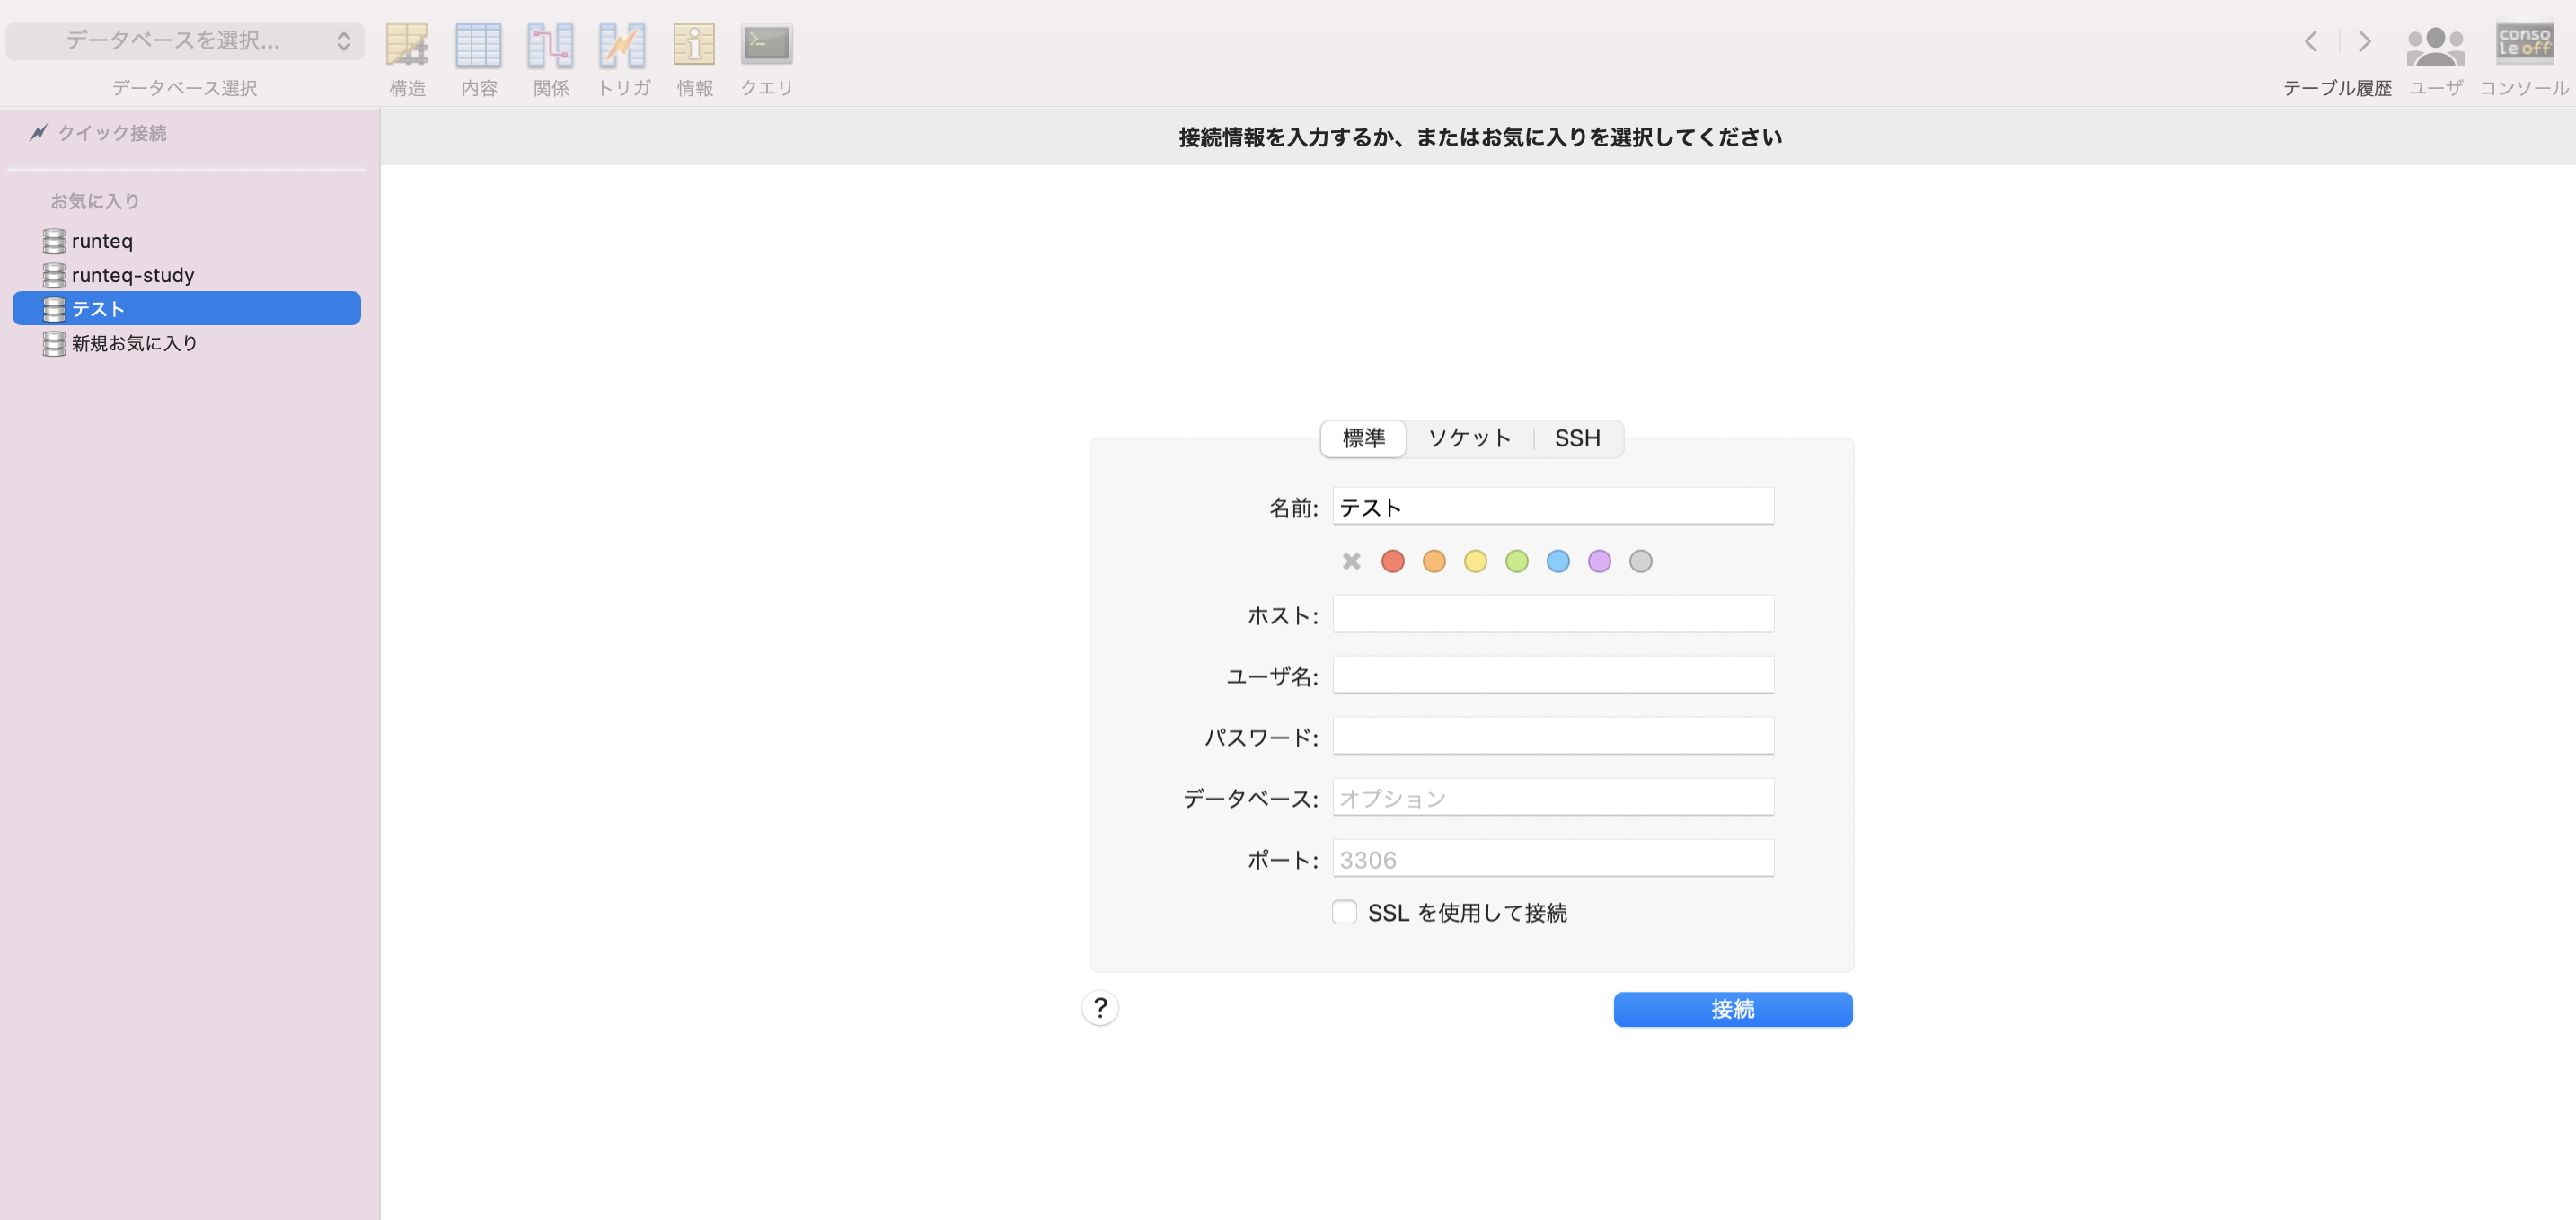
上記の残りの空欄には、以下の値を入れる
ホスト: localhost(今回は、ローカル環境のデータベースを確認するため)(ここにlocalhostと入力すると以下のように表示されて、勝手にホスト番号を入れてくれる)

ユーザー名: MySQLでのユーザー名(このユーザーでMySQLにログインする感じ)
パスワード: MySQLでの上記のユーザーでログインする時のパスワード
データベース: MySQLに存在するデータベース名(ここに入力したデータベースが操作できる)
上記項目を入力したら、接続をクリック
↓
以下のようにして使用できる
MySQLについて
MySQLについて
GitHubからリポジトリをクローンして環境構築をする際にMySQLの導入や使い方で、ハマってしまったので、こちらにまとめます
MySQLは、リレーショナルデータベース管理システムのことである
MySQLは、Railsアプリケーションとやり取りをしてデータベースを操作してくれる
MySQLとRailsアプリケーションは、それぞれのソケットを接続口としてやり取りする(ソケット: プログラムとネットワークとの接続口の事)
ローカル環境でMySQLを実行する際は、Unixドメインソケットが必要で、このソケットファイルの入出力を通じてクライアントとサーバーがやり取りできる
MySQLを使うためには、大まかに以下のような手順になる
今回発生したエラーを時系列ごとに以下に示します
[Gemfile]にmysql2を記述して、bundle installしたところ、以下のようになりました
higmonta@higuchimiyukiyuunoMacBook-Pro sql_active_record_practice % bundle
Fetching gem metadata from https://rubygems.org/............
Fetching rake 13.0.6
Installing rake 13.0.6
Using minitest 5.14.0
Using thread_safe 0.3.6
Using builder 3.2.4
Using erubi 1.9.0
Using websocket-extensions 0.1.4
Using mini_mime 1.0.2
Using bindex 0.8.1
Using crass 1.0.6
Using bundler 2.2.6
Fetching concurrent-ruby 1.1.6
Fetching zeitwerk 2.3.0
Fetching byebug 11.1.1
Fetching msgpack 1.3.3
Fetching mini_portile2 2.6.1
Fetching rack 2.2.2
Fetching racc 1.5.2
Fetching nio4r 2.5.8
Installing zeitwerk 2.3.0
Installing mini_portile2 2.6.1
Installing byebug 11.1.1 with native extensions
Installing msgpack 1.3.3 with native extensions
Installing nio4r 2.5.8 with native extensions
Installing rack 2.2.2
Installing concurrent-ruby 1.1.6
Installing racc 1.5.2 with native extensions
Fetching ffi 1.15.3
Fetching hirb 0.7.3
Installing ffi 1.15.3 with native extensions
Installing hirb 0.7.3
Using rb-fsevent 0.10.3
Using method_source 0.9.2
Using thor 1.0.1
Using tilt 2.0.10
Using spring 2.1.0
Using tzinfo 1.2.6
Using websocket-driver 0.7.1
Using mail 2.7.1
Using rack-test 1.1.0
Fetching ruby_dep 1.5.0
Fetching mysql2 0.5.3
Using sprockets 4.0.0
Installing ruby_dep 1.5.0
Installing mysql2 0.5.3 with native extensions
Fetching i18n 1.8.2
Installing i18n 1.8.2
Fetching puma 4.3.8
Using rb-inotify 0.10.1
Installing puma 4.3.8 with native extensions
Fetching nokogiri 1.12.3 (x86_64-darwin)
Fetching bootsnap 1.4.6
Fetching listen 3.1.5
Fetching activesupport 6.0.2.1
Installing bootsnap 1.4.6 with native extensions
Installing listen 3.1.5
Installing activesupport 6.0.2.1
Using globalid 0.4.2
Installing nokogiri 1.12.3 (x86_64-darwin)
Using rails-dom-testing 2.0.3
Using loofah 2.4.0
Using mimemagic 0.3.10
Using rails-html-sanitizer 1.3.0
Using marcel 0.3.3
Fetching spring-watcher-listen 2.0.1
Installing spring-watcher-listen 2.0.1
Fetching jbuilder 2.10.0
Fetching activemodel 6.0.2.1
Fetching actionview 6.0.2.1
Fetching activejob 6.0.2.1
Fetching sassc 2.4.0
Installing activemodel 6.0.2.1
Installing jbuilder 2.10.0
Installing activejob 6.0.2.1
Installing actionview 6.0.2.1
Installing sassc 2.4.0 with native extensions
Fetching activerecord 6.0.2.1
Installing activerecord 6.0.2.1
Fetching actionpack 6.0.2.1
Installing actionpack 6.0.2.1
Using sprockets-rails 3.2.1
Fetching railties 6.0.2.1
Fetching actionmailer 6.0.2.1
Fetching actioncable 6.0.2.1
Fetching activestorage 6.0.2.1
Installing actionmailer 6.0.2.1
Installing activestorage 6.0.2.1
Installing actioncable 6.0.2.1
Installing railties 6.0.2.1
Fetching actionmailbox 6.0.2.1
Fetching actiontext 6.0.2.1
Installing actiontext 6.0.2.1
Installing actionmailbox 6.0.2.1
Gem::Ext::BuildError: ERROR: Failed to build gem native extension.  ①

    current directory: /Users/higmonta/.rbenv/versions/2.6.5/lib/ruby/gems/2.6.0/gems/mysql2-0.5.3/ext/mysql2
/Users/higmonta/.rbenv/versions/2.6.5/bin/ruby -I /Users/higmonta/.rbenv/versions/2.6.5/lib/ruby/2.6.0 -r ./siteconf20210908-34706-z00lo0.rb extconf.rb
checking for rb_absint_size()... yes
checking for rb_absint_singlebit_p()... yes
checking for rb_wait_for_single_fd()... yes
-----
Using mysql_config at /usr/local/opt/mysql@5.7/bin/mysql_config
-----
checking for mysql.h... yes
checking for errmsg.h... yes
checking for SSL_MODE_DISABLED in mysql.h... yes
checking for SSL_MODE_PREFERRED in mysql.h... yes
checking for SSL_MODE_REQUIRED in mysql.h... yes
checking for SSL_MODE_VERIFY_CA in mysql.h... yes
checking for SSL_MODE_VERIFY_IDENTITY in mysql.h... yes
checking for MYSQL.net.vio in mysql.h... yes
checking for MYSQL.net.pvio in mysql.h... no
checking for MYSQL_ENABLE_CLEARTEXT_PLUGIN in mysql.h... yes
checking for SERVER_QUERY_NO_GOOD_INDEX_USED in mysql.h... yes
checking for SERVER_QUERY_NO_INDEX_USED in mysql.h... yes
checking for SERVER_QUERY_WAS_SLOW in mysql.h... yes
checking for MYSQL_OPTION_MULTI_STATEMENTS_ON in mysql.h... yes
checking for MYSQL_OPTION_MULTI_STATEMENTS_OFF in mysql.h... yes
checking for my_bool in mysql.h... yes
-----
Don't know how to set rpath on your system, if MySQL libraries are not in path mysql2 may not load
-----
-----
Setting libpath to /usr/local/opt/mysql@5.7/lib
-----
creating Makefile

current directory: /Users/higmonta/.rbenv/versions/2.6.5/lib/ruby/gems/2.6.0/gems/mysql2-0.5.3/ext/mysql2
make "DESTDIR=" clean

current directory: /Users/higmonta/.rbenv/versions/2.6.5/lib/ruby/gems/2.6.0/gems/mysql2-0.5.3/ext/mysql2
make "DESTDIR="
compiling client.c
compiling infile.c
compiling mysql2_ext.c
compiling result.c
compiling statement.c
linking shared-object mysql2/mysql2.bundle
ld: library not found for -lssl     ②
clang: error: linker command failed with exit code 1 (use -v to see invocation)    ②
make: *** [mysql2.bundle] Error 1

make failed, exit code 2

Gem files will remain installed in /Users/higmonta/.rbenv/versions/2.6.5/lib/ruby/gems/2.6.0/gems/mysql2-0.5.3 for inspection.
Results logged to /Users/higmonta/.rbenv/versions/2.6.5/lib/ruby/gems/2.6.0/extensions/x86_64-darwin-20/2.6.0/mysql2-0.5.3/gem_make.out

An error occurred while installing mysql2 (0.5.3), and Bundler cannot continue.
Make sure that `gem install mysql2 -v '0.5.3' --source 'https://rubygems.org/'` succeeds before bundling.  ③

In Gemfile:
  mysql2
①のエラーについては、下記記事を参考に以下のようにして解消できた(mimemagicのライセンス問題のよう)
$ brew install shared-mime-info

$ bundle install
③の記載通り以下を実行したが、以下のようになり何もならなかった
$ gem install mysql2 -v '0.5.3' -source 'https://rubygems.org/
quote>
②の部分で何か情報が無いかと思い、以下の記事を参考に下記を実行しました
【Rails】MySQL2がbundle installできない時の対応方法 - Qiita
higmonta@higuchimiyukiyuunoMacBook-Pro sql_active_record_practice % brew info openssl
openssl@1.1: stable 1.1.1l (bottled) [keg-only]
Cryptography and SSL/TLS Toolkit
https://openssl.org/
/usr/local/Cellar/openssl@1.1/1.1.1k (8,071 files, 18.5MB)
  Poured from bottle on 2021-03-30 at 21:47:31
From: https://github.com/Homebrew/homebrew-core/blob/HEAD/Formula/openssl@1.1.rb
License: OpenSSL
==> Caveats
A CA file has been bootstrapped using certificates from the system
keychain. To add additional certificates, place .pem files in
  /usr/local/etc/openssl@1.1/certs

and run
  /usr/local/opt/openssl@1.1/bin/c_rehash

openssl@1.1 is keg-only, which means it was not symlinked into /usr/local,
because macOS provides LibreSSL.

==> Analytics
install: 918,540 (30 days), 2,012,009 (90 days), 9,012,699 (365 days)
install-on-request: 69,086 (30 days), 146,620 (90 days), 1,031,017 (365 days)
build-error: 0 (30 days) ①
①で[build-error]となってしまい、下記記事を参考に[build-error]が何なのか調べたところ、実行ファイルが作成できないとのこと
エラーについて | Programming Place Plus 新C++編
opensslの[build-error]について下記記事を参考に、opensslというものがそもそもインストールされていないのではないかと思い、以下を実行しました
※OpenSSL: インターネット上で標準的に利用される暗号通信プロトコルであるSSLおよびTLSの機能を実装した、オープンソースのライブラリ
MacのhomebrewでOpenSSLがビルドエラーになる場合の対処方法|TechRacho by BPS株式会社
$ brew install openssl
上記の実行がうまくいき、opensslをインストールできました
opensslがインストールできたので、下記記事を参考に以下を実行しました
【Rails】MySQL2がbundle installできない時の対応方法 - Qiita
higmonta@higuchimiyukiyuunoMacBook-Pro sql_active_record_practice % brew info openssl

openssl@1.1: stable 1.1.1l (bottled) [keg-only]
Cryptography and SSL/TLS Toolkit
https://openssl.org/
/usr/local/Cellar/openssl@1.1/1.1.1l (8,073 files, 18.5MB)
  Poured from bottle on 2021-09-09 at 19:59:37
From: https://github.com/Homebrew/homebrew-core/blob/HEAD/Formula/openssl@1.1.rb
License: OpenSSL
==> Caveats
A CA file has been bootstrapped using certificates from the system
keychain. To add additional certificates, place .pem files in
  /usr/local/etc/openssl@1.1/certs

and run
  /usr/local/opt/openssl@1.1/bin/c_rehash

openssl@1.1 is keg-only, which means it was not symlinked into /usr/local,
because macOS provides LibreSSL.

If you need to have openssl@1.1 first in your PATH, run:
  echo 'export PATH="/usr/local/opt/openssl@1.1/bin:$PATH"' >> ~/.zshrc

For compilers to find openssl@1.1 you may need to set:
  export LDFLAGS="-L/usr/local/opt/openssl@1.1/lib"         ①
  export CPPFLAGS="-I/usr/local/opt/openssl@1.1/include"  ②

For pkg-config to find openssl@1.1 you may need to set:
  export PKG_CONFIG_PATH="/usr/local/opt/openssl@1.1/lib/pkgconfig"

==> Analytics
install: 918,540 (30 days), 2,012,009 (90 days), 9,012,699 (365 days)
install-on-request: 69,086 (30 days), 146,620 (90 days), 1,031,017 (365 days)
build-error: 0 (30 days)
参考記事通りに上記の①、②でパスが出力されました
パスが出力されたので、参考記事通りに以下を実行しました
higmonta@higuchimiyukiyuunoMacBook-Pro sql_active_record_practice % bundle config --local build.mysql2 "--with-cppflags=-I/usr/local/opt/openssl@1.1/include"

higmonta@higuchimiyukiyuunoMacBook-Pro sql_active_record_practice % bundle config --local build.mysql2 "--with-ldflags=-L/usr/local/opt/openssl@1.1/lib"
-L/usr/local/opt/openssl@1.1/lib"
You are replacing the current local value of build.mysql2, which is currently "--with-cppflags=-I/usr/local/opt/openssl@1.1/include"
参考記事通りに実行したので、以下のようにbundle installを実行したところ今度は、うまくいきました
今までやった過程を整理すると、MySQLをインストールするのには、暗号化通信(SSL)を利用するため、OpenSSLをインストールし、MySQLをローカルにインストールする場所が不明だったため、パスを指定したということ?なのかと思いました。
$ bundle install
クローンしたリポジトリのREADME通りに次は、[bundle exec rails db:create]を実行しましたが、またもエラーになってしまいました
higmonta@higuchimiyukiyuunoMacBook-Pro sql_active_record_practice % bundle exec rails db:create
bundle exec rails db:create
Can't connect to local MySQL server through socket '/tmp/mysql.sock' (2)    ①
Couldn't create 'sakila_rails_development' database. Please check your configuration.
rails aborted!
Mysql2::Error::ConnectionError: Can't connect to local MySQL server through socket '/tmp/mysql.sock' (2)
/Users/higmonta/workspace/runteq/application_tasks/sql_active_record_practice/bin/rails:9:in `<top (required)>'
/Users/higmonta/workspace/runteq/application_tasks/sql_active_record_practice/bin/spring:15:in `require'
/Users/higmonta/workspace/runteq/application_tasks/sql_active_record_practice/bin/spring:15:in `<top (required)>'
bin/rails:3:in `load'
bin/rails:3:in `<main>'
Tasks: TOP => db:create
(See full trace by running task with --trace)
①で、ローカルのMySQLサーバーにソケット'/tmp/mysql.sock'を介して接続できません。となっています
以下の参考記事を参考に権限を変えましたが、ファイルが無いとなってしまいうまくいきませんでした
higmonta@higuchimiyukiyuunoMacBook-Pro ~ % sudo chown higmonta /tmp/mysql.sock

Password:
chown: /tmp/mysql.sock: No such file or directory
下記コマンドでファイルを調べたところ、確かに[/tmp]フォルダ以下に[mysql.sock]ファイルがありませんでした。
higmonta@higuchimiyukiyuunoMacBook-Pro /tmp % ls

com.apple.launchd.2zs9YAoLX2    tmp8b0ymce2cacert.pem
下記記事を参考に以下コマンドで[mysql.sock]ファイルを作成しました
mysqlが起動できない(Can't connect to local MySQL server through socket '/tmp/mysql.sock' (2)) - Qiita
higmonta@higuchimiyukiyuunoMacBook-Pro /tmp % ls
com.apple.launchd.2zs9YAoLX2    powerlog                        tmp8b0ymce2cacert.pem           tmpzxo91tzpcacert.pem
higmonta@higuchimiyukiyuunoMacBook-Pro /tmp % touch mysql.sock
ローカルPC上でプロセス同士で通信をする際は、UNIXドメインソケット([/tmp/mysql.sock]ファイルのこと)が必要という事が分かり、また、そのソケットはtouchコマンドで自分で空のファイルを作るだけで大丈夫ということが分かりました。
また、MySQLを動かす際には(データベース作成など)MySQLのサーバーを起動しなければいけないということも分かりました。
以下でMySQLのサーバーを起動して、実行したところうまくいきました。
higmonta@higuchimiyukiyuunoMacBook-Pro sql_active_record_practice % mysql.server start
Starting MySQL
.. SUCCESS!

higmonta@higuchimiyukiyuunoMacBook-Pro sql_active_record_practice % bundle exec rails db:create
Created database 'sakila_rails_development'
Created database 'skila_rals_test'

higmonta@higuchimiyukiyuunoMacBook-Pro sql_active_record_practice % bundle exec rails db < db/seed.sql
ここまでで、MySQLのインストールとMySQLのサーバーを起動できるようになったので、MySQLにログインしてみます。
ここでもハマってしまったので、こちらにまとめます
MySQLへのログイン方法を調べると以下のようになっていました
[mysql -u ユーザー名 -p]を実行するとパスワード入力欄が出てくるので、そこにパスワードを入力
MySQLのアカウントを作成とかしていないしユーザー名ってのは、PCのユーザー名でパスワードもPCのパスワードのこと?と思い以下を実行しました
higmonta@higuchimiyukiyuunoMacBook-Pro sql_active_record_practice % mysql -u higmonta -p
Enter password:
ERROR 1045 (28000): Access denied for user 'higmonta'@'localhost' (using password: YES)

higmonta@higuchimiyukiyuunoMacBook-Pro sql_active_record_practice % mysql -u higmonta
ERROR 1045 (28000): Access denied for user 'higmonta'@'localhost' (using password: NO)
上記のようになってしまい、ログインできませんでした
下記の参考記事を参考に、PCにログインしているユーザーアカウントとMySQLのアカウントは別で、MySQLにアカウントを作らなければいけないという事が分かりました。
まずrootユーザーでMySQLにログインして指定したユーザーのアカウントを作ろうと以下を実行しうまくいきました。
higmonta@higuchimiyukiyuunoMacBook-Pro sql_active_record_practice % mysql -u root
Welcome to the MySQL monitor.  Commands end with ; or \g.
Your MySQL connection id is 9
Server version: 5.7.35 Homebrew

Copyright (c) 2000, 2021, Oracle and/or its affiliates.

Oracle is a registered trademark of Oracle Corporation and/or its
affiliates. Other names may be trademarks of their respective
owners.

Type 'help;' or '\h' for help. Type '\c' to clear the current input statement.

mysql> create user `(ユーザー名)`@`localhost` IDENTIFIED BY '(パスワード)';
Query OK, 0 rows affected (0.01 sec)

mysql> quit
Bye
作成したユーザーでログインして、データベースを作成したらエラーになったが、これは作成したユーザーがデータベース作成の権限がなかったため
higmonta@higuchimiyukiyuunoMacBook-Pro sql_active_record_practice % mysql -u higmonta -p
Enter password:
Welcome to the MySQL monitor.  Commands end with ; or \g.
Your MySQL connection id is 10
Server version: 5.7.35 Homebrew

Copyright (c) 2000, 2021, Oracle and/or its affiliates.

Oracle is a registered trademark of Oracle Corporation and/or its
affiliates. Other names may be trademarks of their respective
owners.

Type 'help;' or '\h' for help. Type '\c' to clear the current input statement.

mysql> create database runteq_study;
ERROR 1044 (42000): Access denied for user 'higmonta'@'localhost' to database 'runteq_study'
下記のようにrootユーザーでログインして、データベースを作成したいユーザーにデータベースの全権限を付与した
igmonta@higuchimiyukiyuunoMacBook-Pro sql_active_record_practice % mysql -u root
Welcome to the MySQL monitor.  Commands end with ; or \g.
Your MySQL connection id is 11
Server version: 5.7.35 Homebrew

Copyright (c) 2000, 2021, Oracle and/or its affiliates.

Oracle is a registered trademark of Oracle Corporation and/or its
affiliates. Other names may be trademarks of their respective
owners.

Type 'help;' or '\h' for help. Type '\c' to clear the current input statement.

mysql> GRANT ALL ON *.* TO '(ユーザー名)'@'localhost' IDENTIFIED BY '(パスワード)';
Query OK, 0 rows affected, 1 warning (0.00 sec)
MySQLでよく使うコマンド
・MySQLのサーバー起動
$ mysql.server restart
・MySQLのサーバーの停止
$ mysql.server stop
・ログイン
# -p オプションはパスワード設定しているときのみ付与する

$ mysql -u [ユーザー名] -p
# localhostのMySQLサーバに接続する場合

$ mysql -u [ユーザー名] -p -h [host名] -P [ポート番号]
# 外部MySQLサーバに接続する場合
・ログアウト
mysql > \q
mysql > quit
mysql > exit
・ユーザー情報を取得
mysql > select user, host from mysql.user;
・ユーザーの追加(ログインしているユーザーがユーザーの追加権限を持っていないとできない(最初は、rootユーザーでやる))
mysql > create user `testtest`@`localhost` IDENTIFIED BY 'password';

# ユーザー名: testtest
   パスワード: password
 ホスト名: localhost
・ユーザーへ権限を付与(ログインしているユーザーがユーザーへの権限付与の権限を持っていないとできない(最初は、rootユーザーでやる))(以下は、ALLで全ての権限を付与している例)
mysql > grant all privileges on test_db.* to testtest@localhost IDENTIFIED BY 'password';
# 対象: testtest@localhost
    対象のパスワード: password
    操作できるデータベース名: test_db
・データベース一覧の表示
mysql > show databases;
・データベースの選択
mysql > use test_db;
・データベースの追加
mysql > create database test_db;
・テーブル一覧の表示
mysql > show tables;
・SQLコマンドでデータを取得(以下が例)したり、テーブルを作成したり、テーブルにデータを入れたり、データを更新したり、データを削除したりなどできる
mysql> select * from board;
+----+-------+------------------+---------+
| id | title | body             | user_id |
+----+-------+------------------+---------+
|  1 | hoge  | hogehogehogehoge |       1 |
|  2 | fuga  | fugafugafugafuga |       1 |
|  3 | bar   | barbarbarbar     |       2 |
+----+-------+------------------+---------+
3 rows in set (0.00 sec)
※ポイント
MySQLを実際に使用する際の手順は、以下のようになります
- MySQLのサーバーを起動
$ mysql.server restart
- 対象のユーザーでログイン
# -p オプションはパスワード設定しているときのみ付与する

$ mysql -u [ユーザー名] -p
# localhostのMySQLサーバに接続する場合

$ mysql -u [ユーザー名] -p -h [host名] -P [ポート番号]
# 外部MySQLサーバに接続する場合
- データベースの一覧を表示して、使用するデータベースを選択する
mysql > show databases;
# データベースの一覧を表示

mysql > use test_db;
# 使用するデータベースを選択
参考記事
【Rails】MySQL2がbundle installできない時の対応方法 - Qiita
OpenSSLの仕組みとは?初歩から解説! | CodeCampus
MySQL起動エラーの対処の仕方【Can't connect to local MySQL server through socket '/tmp/mysql.sock' (38)】 - Qiita
[2002] MySQLのソケットエラー の原因と対処法 | 株式会社ビヨンド
MySQL|ユーザーアカウントの確認、作成、変更 - わくわくBank
MySQLで新規にデータベースを作成・削除する方法 | サービス | プロエンジニア